


 Description
Servlets Eclipse, Before developing a web project in any IDE, programmers should have a knowledge regarding the structure of the project like where the required files needs to be kept, such as JAVA , HTML , XML and how to compile the program and how to debug the program, for every project it is better to create a new work space because in future developer can easily identify the project location for the modifications. Following are the steps needs to be followed in MyEclipse while creating the project.
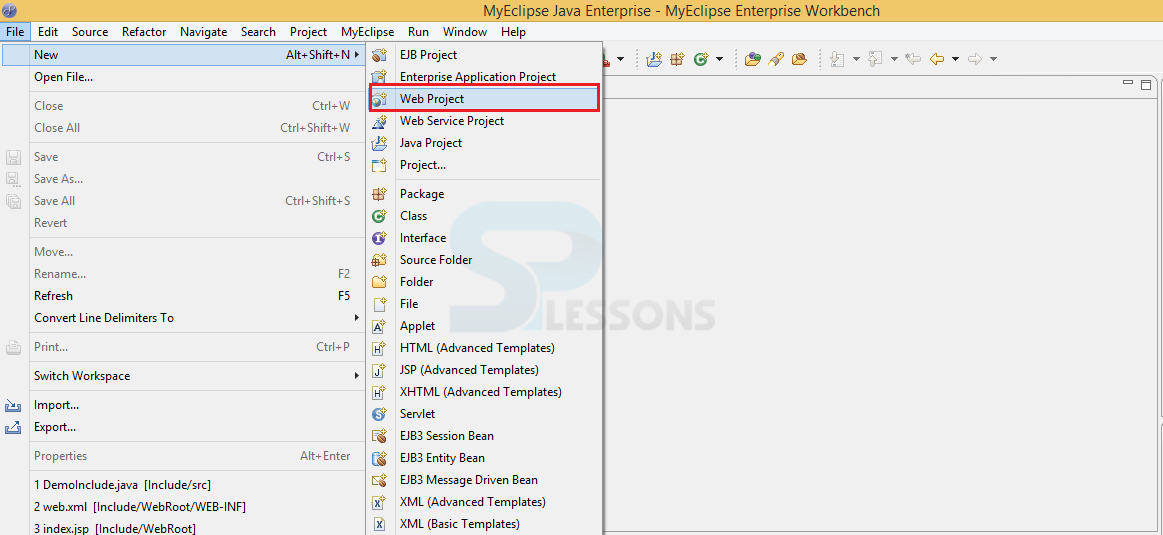
Step 1
Open Myeclipse -> File -> New -> open Web project.
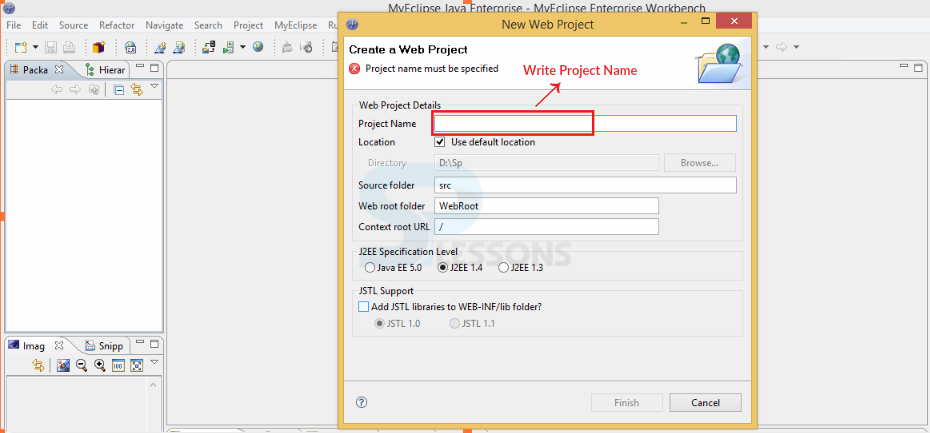
Step 2
Enter Name of the project as shown in below figure.
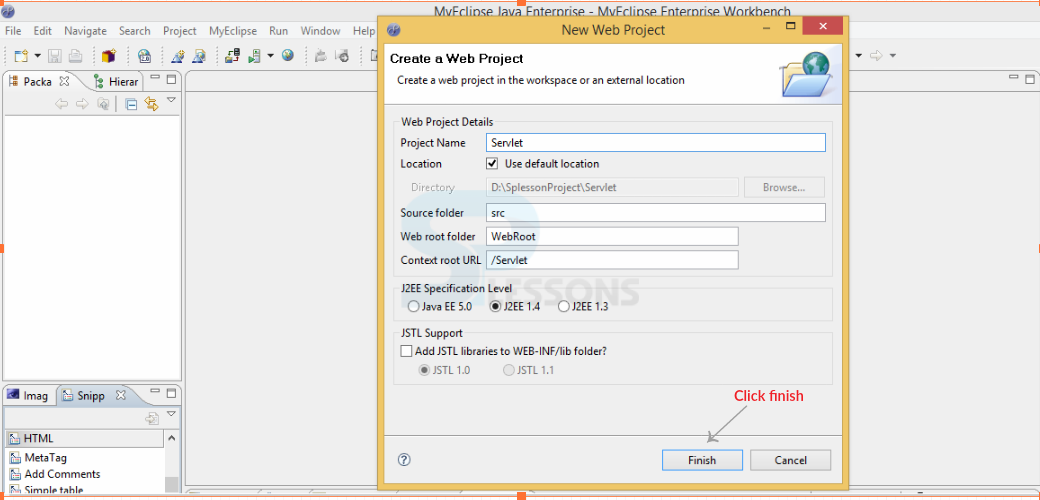
Step 3
Click Finish button.
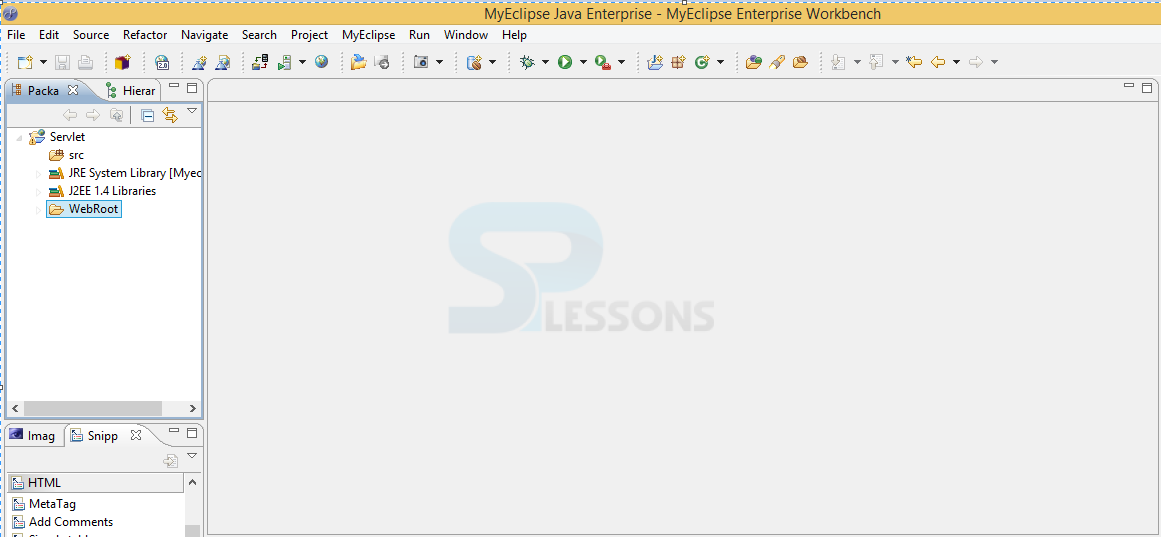
Step 4
Open the project.
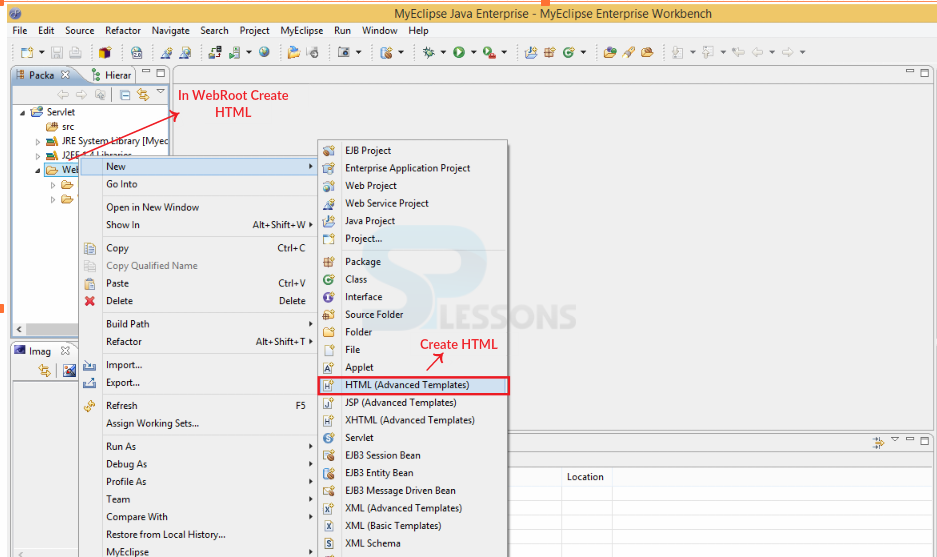
Step 5
Create Html inside WebRoot.
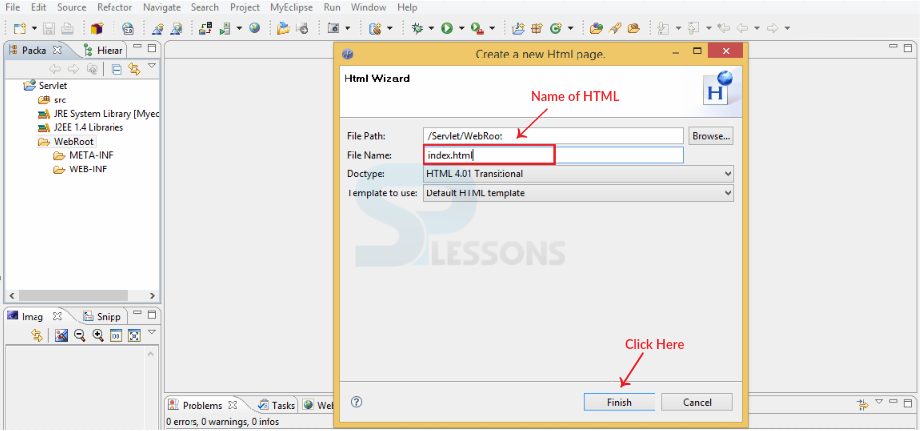
Step 6
Name the HTML File.
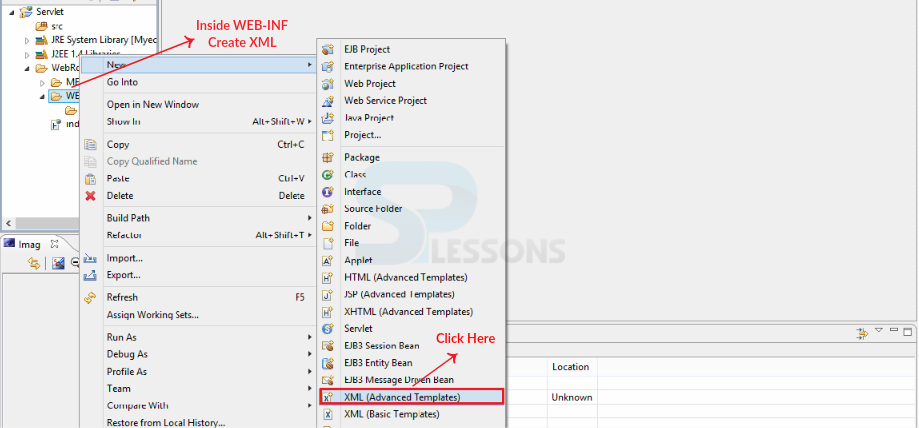
Step 7
Create XML inside Web-INF.
Step 8
Give Name for XML File.

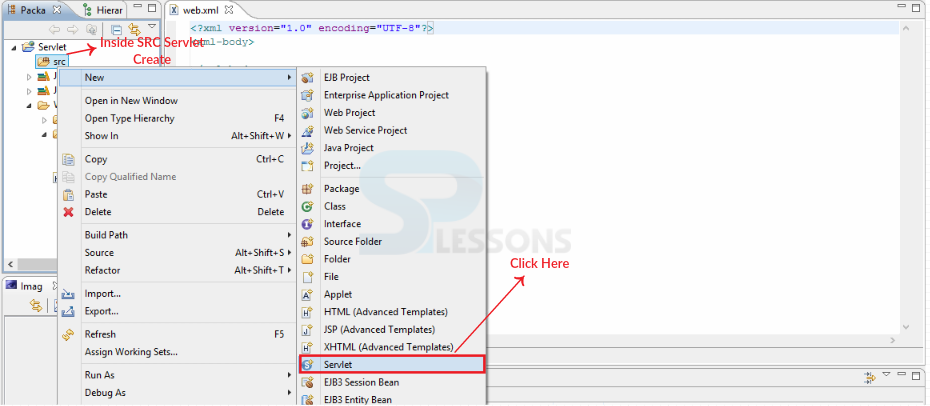
Step 9
Create Servlet inside src.
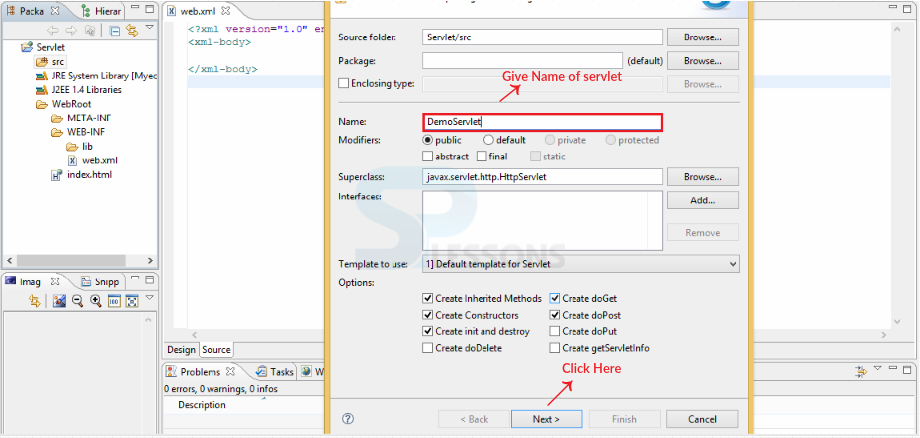
Step 10
Give the name of Servlet.
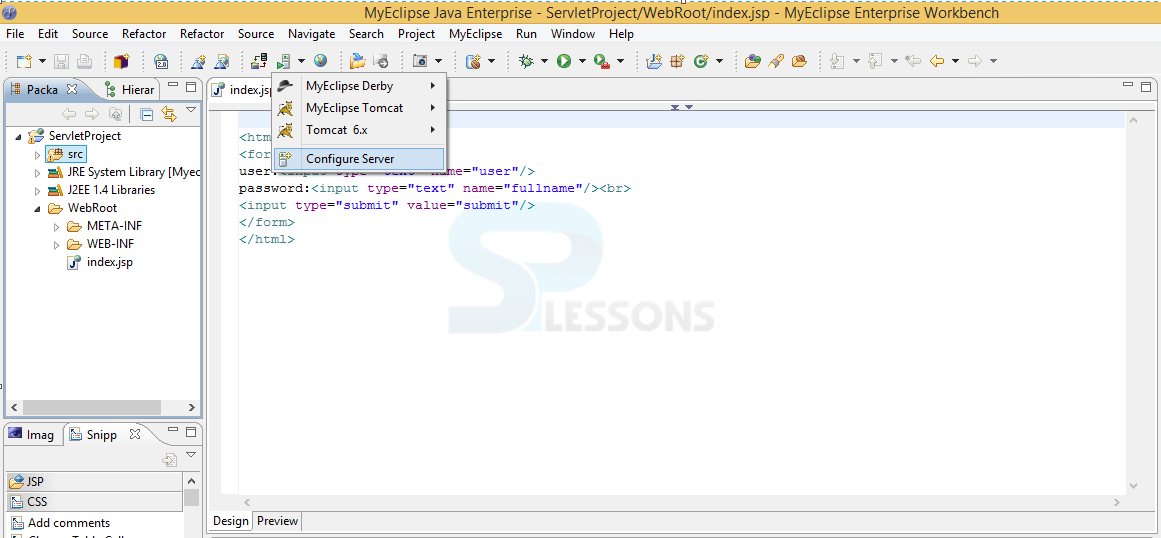
Step 11
Configure Tomcat as shown below, make sure to download latest version.
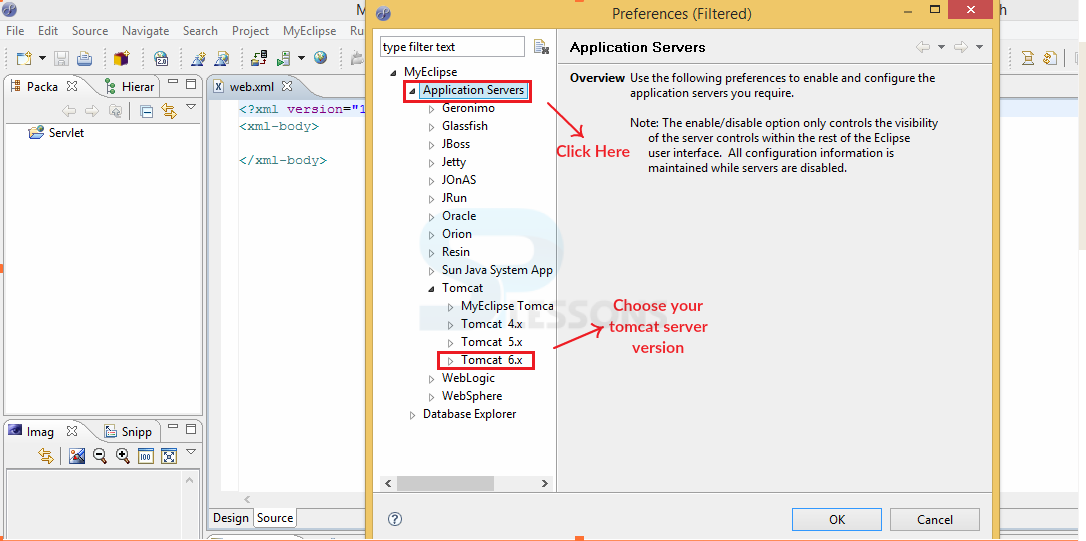
Step 12
Go to Application Server in Tomcat and choose TomcatVersion.
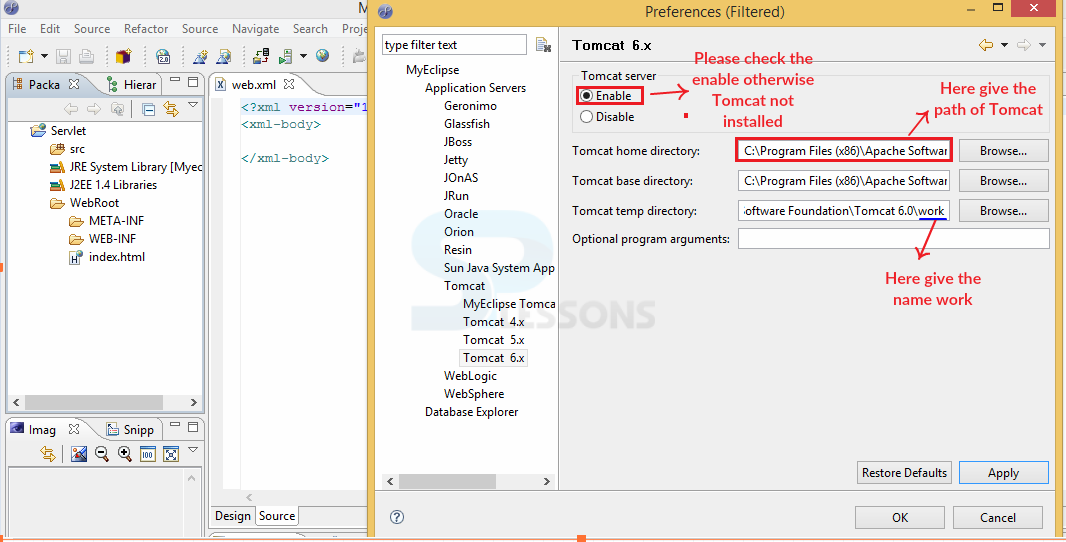
Step 13
First Enable and give the path to tomcat server. In tomcat temp directory, give the name as work.
Step 14
Next if clicked on tomcat then below JDK will be available. Click on JDK. A popup is opened. Then click on Add.
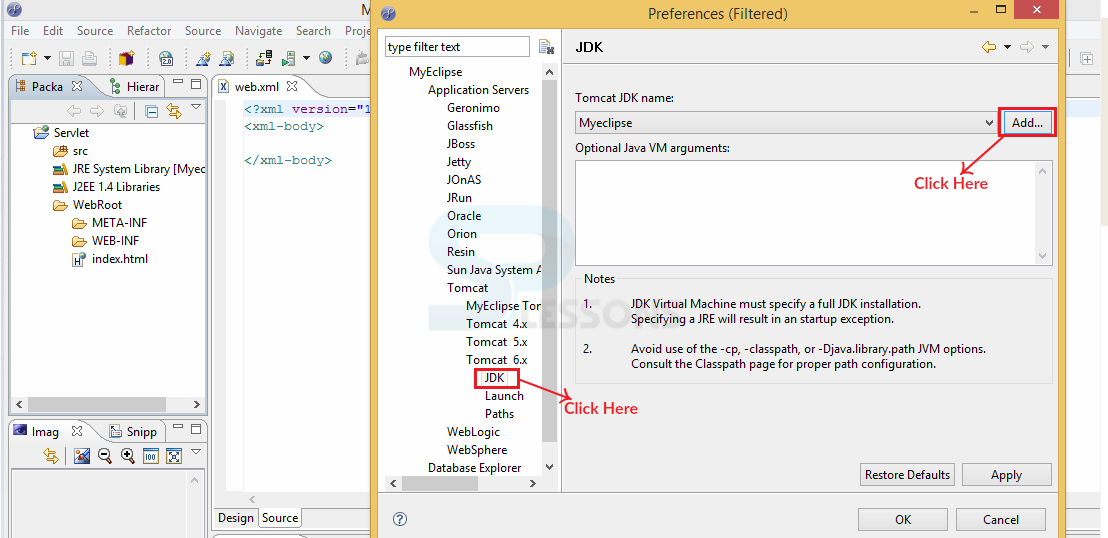
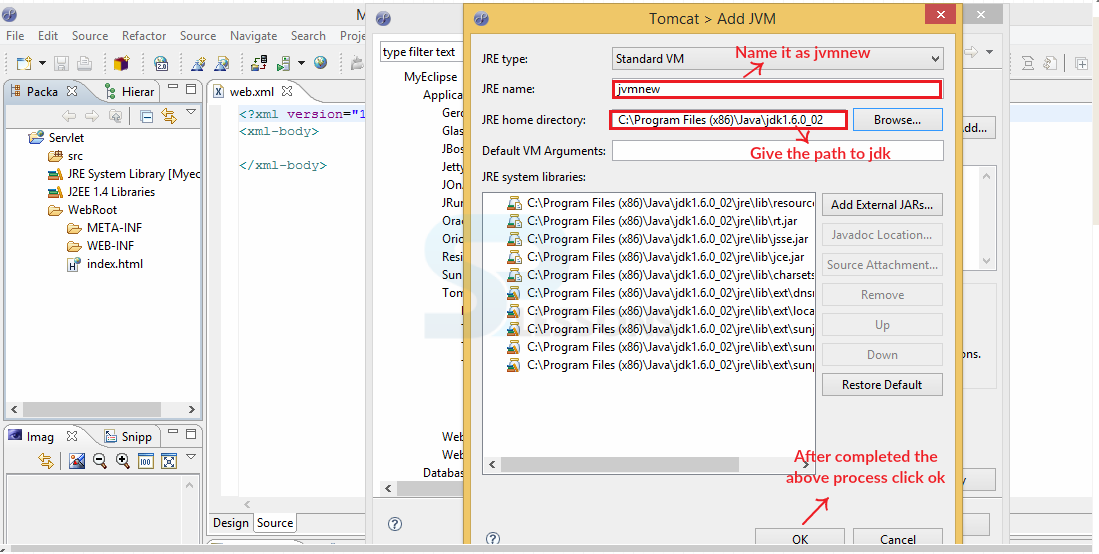
Step 15
Give the name as jvmnew and give the path to installed JDK. Click OK
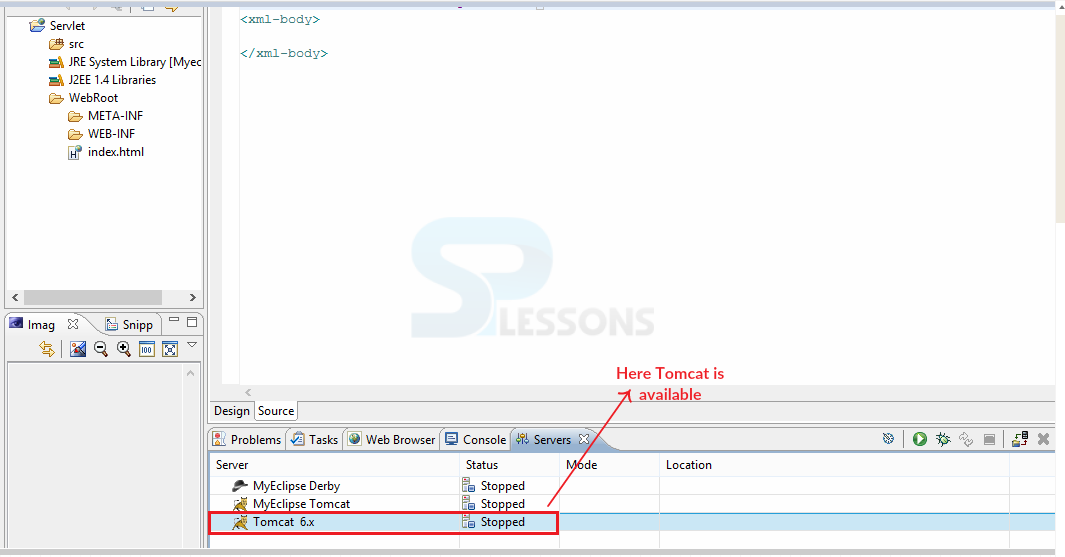
Step 16
Below picture shows Tomcat server.
Key Points
- Servlets Eclipse - While doing project on servlet take web project in an IDE.
- Servlets Eclipse - WEB.XML file will be generated automatically while creating the project.
- Servlets Eclipse - Java related files will be kept under java resources.