


 Introduction
This chapter gives an overview about WordPress Appearance. Appearance window allows the user to add styles to the site by setting themes and customizing some menus. The following concepts are covered in this chapter:
- Themes
- Customize
- Widget
- Editor
Description
Themes are used to style the WordPress sites visually and provide different functionality or alter the overall appearance of the site.
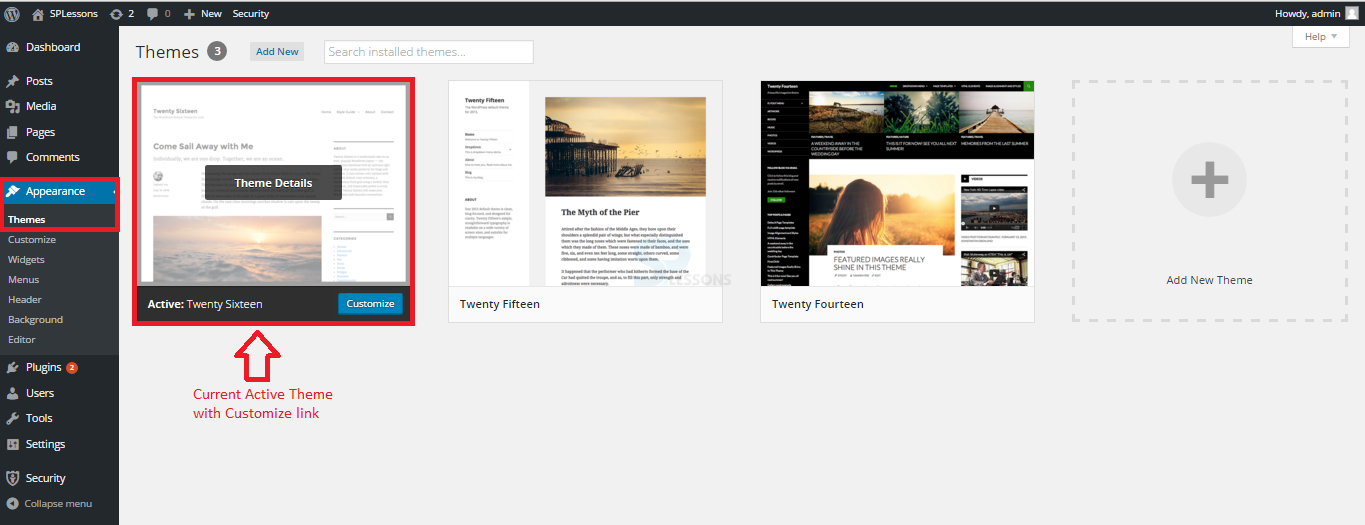
The Themes page displays a visual list of all the themes that are currently installed and provides a number of different options for each theme. Users can activate a theme that is not currently active, display a live preview of the theme and show the details of the theme like description from the style.CSS or delete the theme from the site.
At the top, the Themes page provide some information and a screenshot of the currently active theme, along with links to customize options and features that the theme supports as shown in the image below.
Description
In order to install a Theme, first log into the WordPress Admin Panel and click the Appearance section. Go to themes and click Add New button for installing as shown in the below image.
 Themes can be installed in two methods, they are:
Method 1
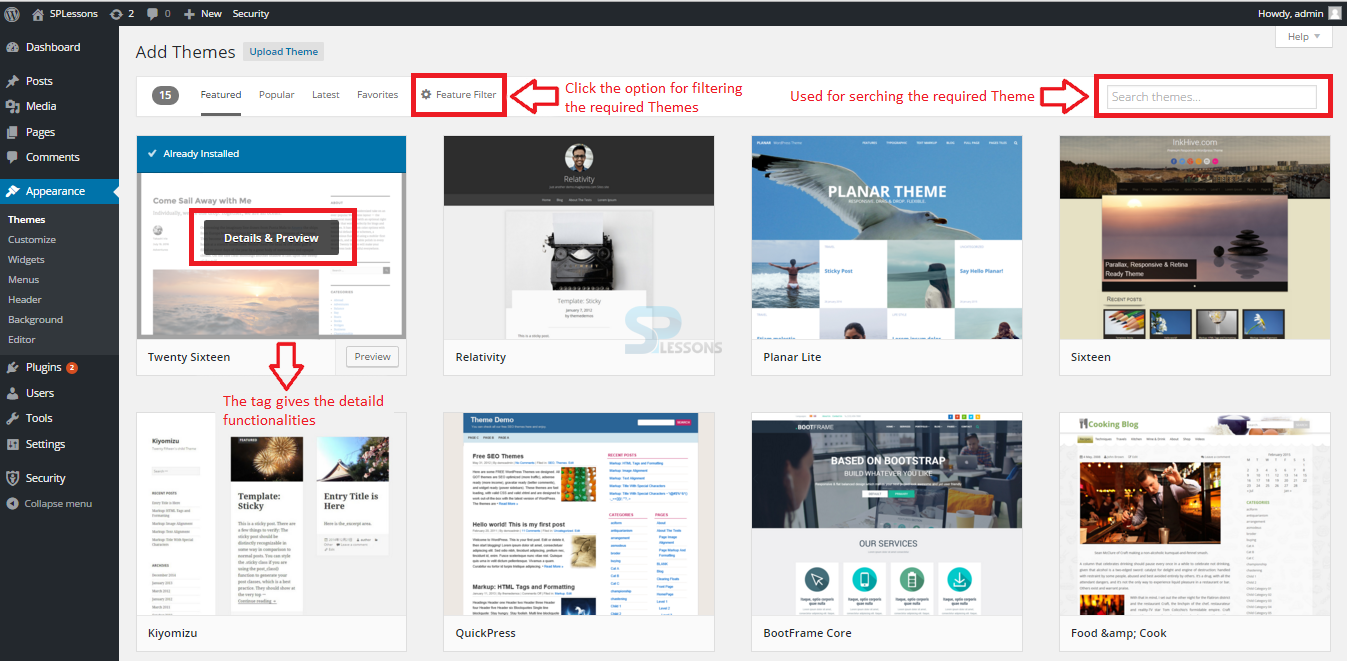
Themes can be installed easily from the WordPress official website. A number of themes are available in the WordPress theme directory. Users can even search for themes directly from the admin panel if the theme name is known.
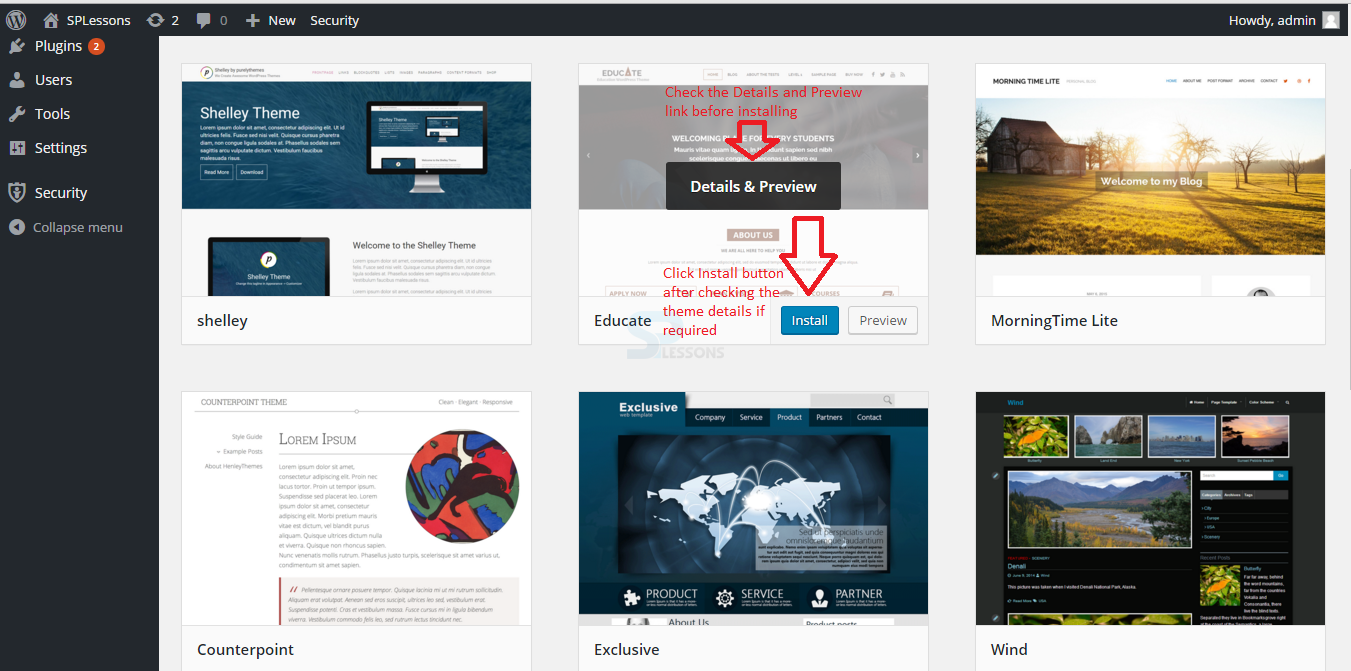
The theme functionalities can be known easily by using the Details and Preview tag on each theme. Users can even use the option Feature Filter to filter the required themes, as shown in the image below:
 By clicking the Feature Filter option, a page appears as shown in the image below:
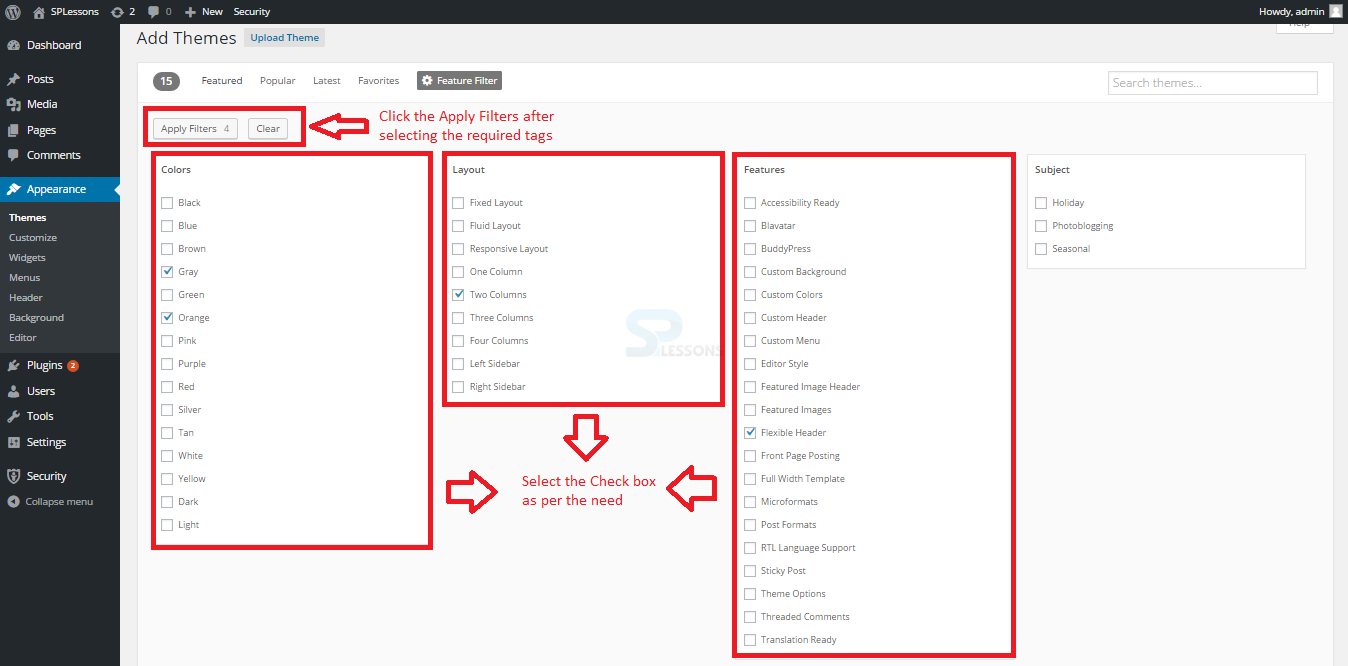 Simply check the Color, Layout, Features, Subject tags as per the need and click the Apply Filters button as shown in the image above.
Immediately after applying the filter options, a page with some themes as per the filter options will appear. After checking the details, preview select the preferred theme by clicking the Install button as shown in the image below:
Simply check the Color, Layout, Features, Subject tags as per the need and click the Apply Filters button as shown in the image above.
Immediately after applying the filter options, a page with some themes as per the filter options will appear. After checking the details, preview select the preferred theme by clicking the Install button as shown in the image below:
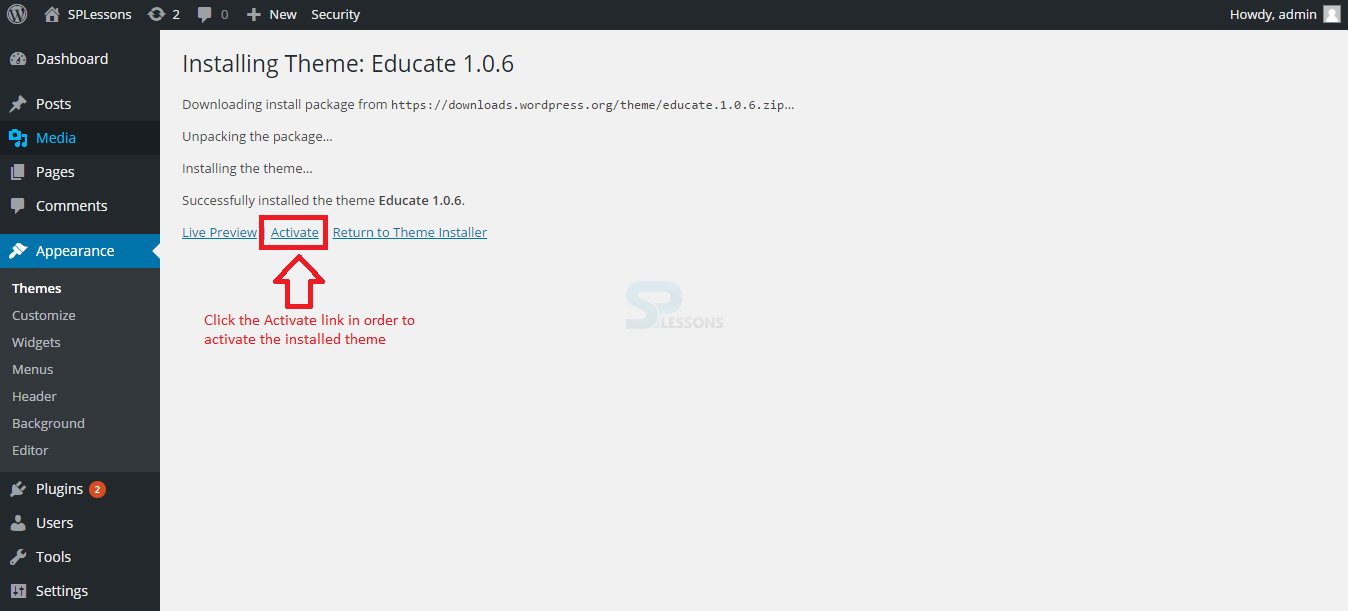
 After clicking the Install button, a page showing the installation process will appear. After successful installation, the page with three links like Live Preview, Active, Return to Theme installer will appear. Click the Active link to activate the theme for site as shown in the image below:
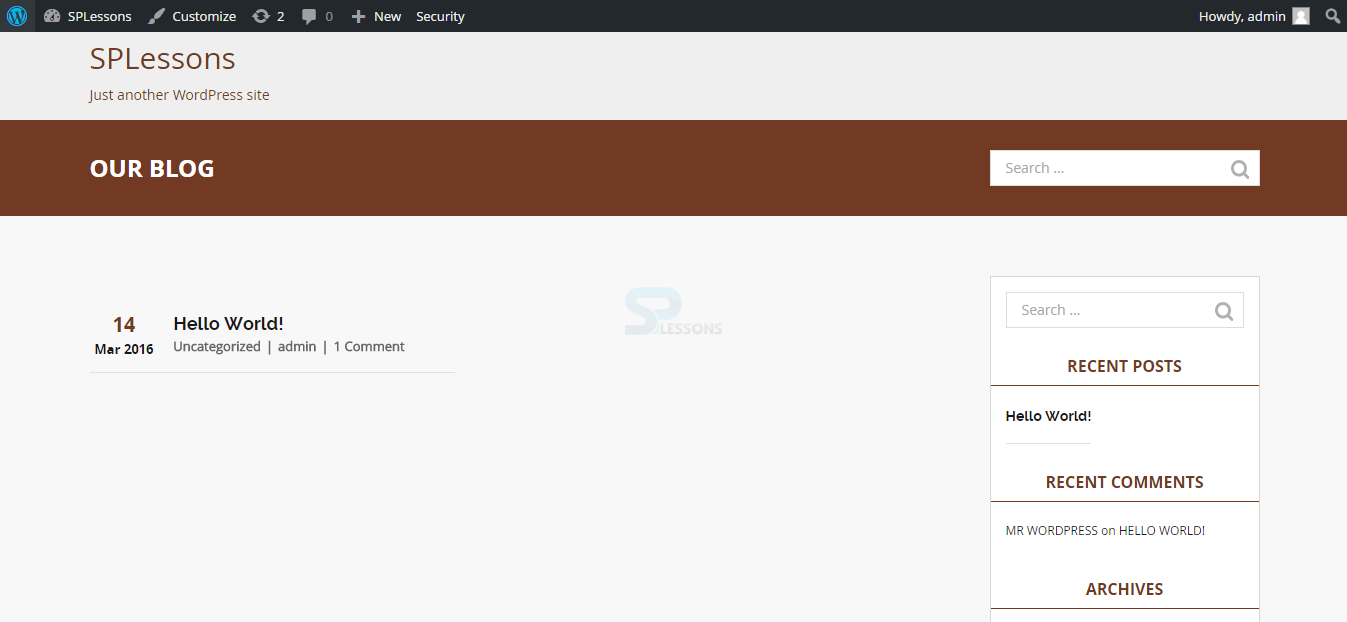
 Now, go to the front page of the site and check the outview of the site for the above installed theme as shown in the below image.
Method 2
The alternate method for installing the themes are Uploading, download the required theme archive file before uploading.
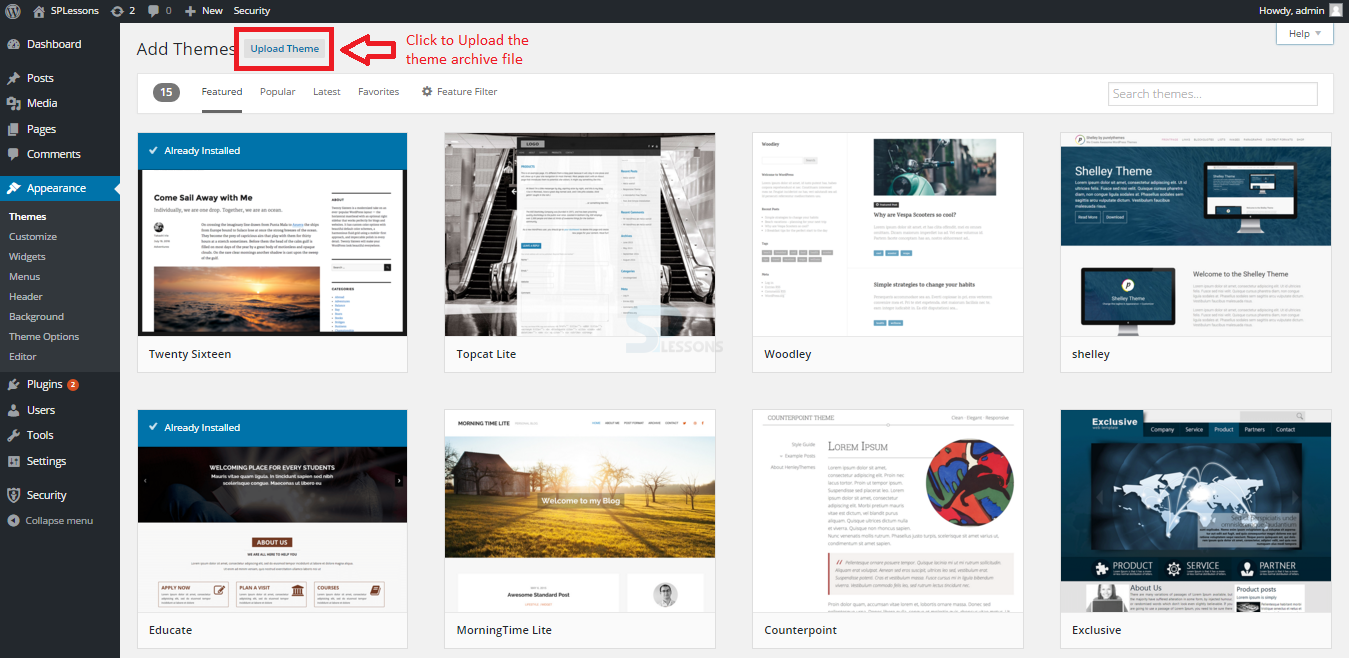
In order to upload, go to Themes -> Install Themes section -> click Upload button as shown in the image below.
 Now choose the file location by clicking the Choose File button and install the theme by clicking the Install Now button as shown in the image below.
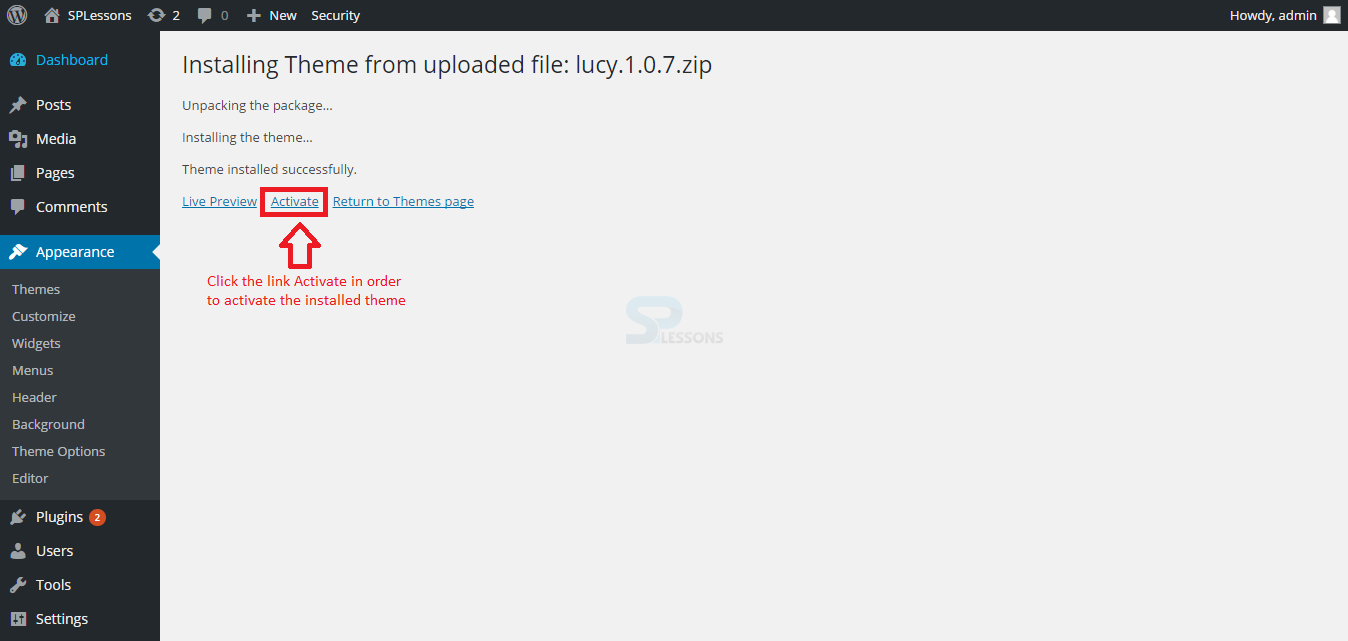
 Now, a page appears after clicking the Install button showing the installation process, after successful installation the page provides three links like Live Preview, Active, Return to Theme installer. Proceed by clicking the Active link in order to activate the theme for site as shown in the image below.
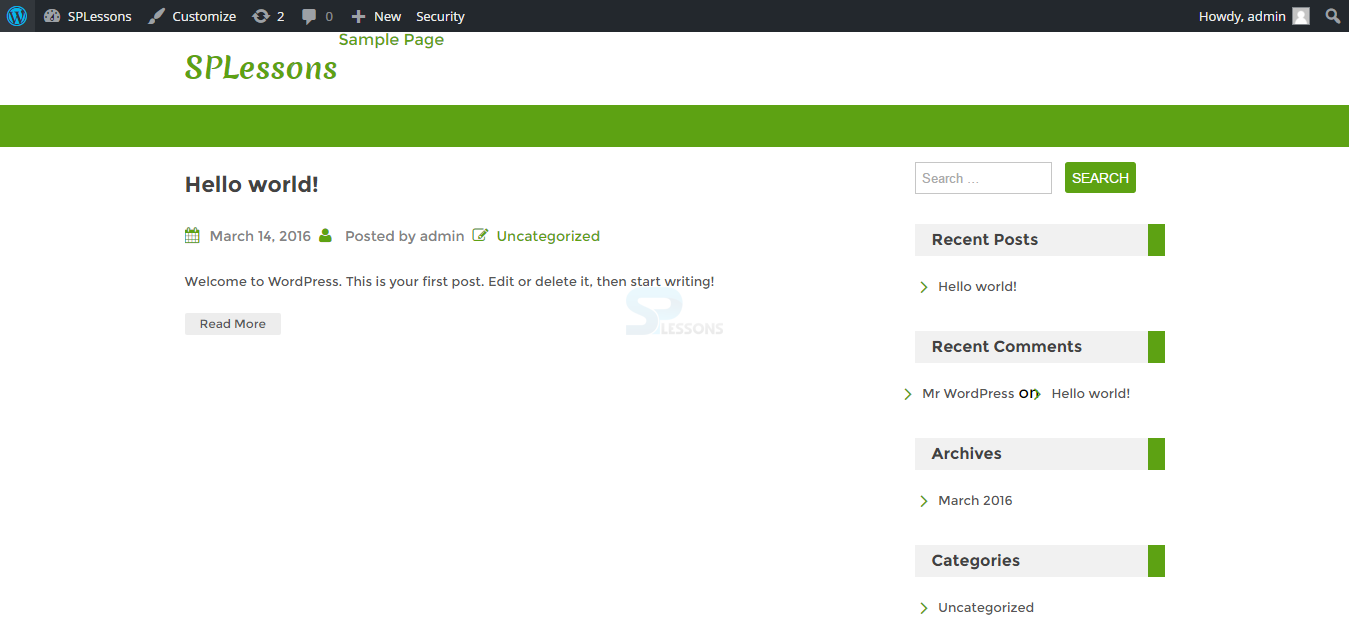
 Now, go to the front page of the site and check the output view of the site and the view for the above theme is shown in the below image.
Description
WordPress theme customization depends on the type of theme selected i.e. each theme has different types of settings. Customization is mainly used to structure the site in a new way.
The page provides different setting options like Colors, Widgets, Background images, and General Settings.
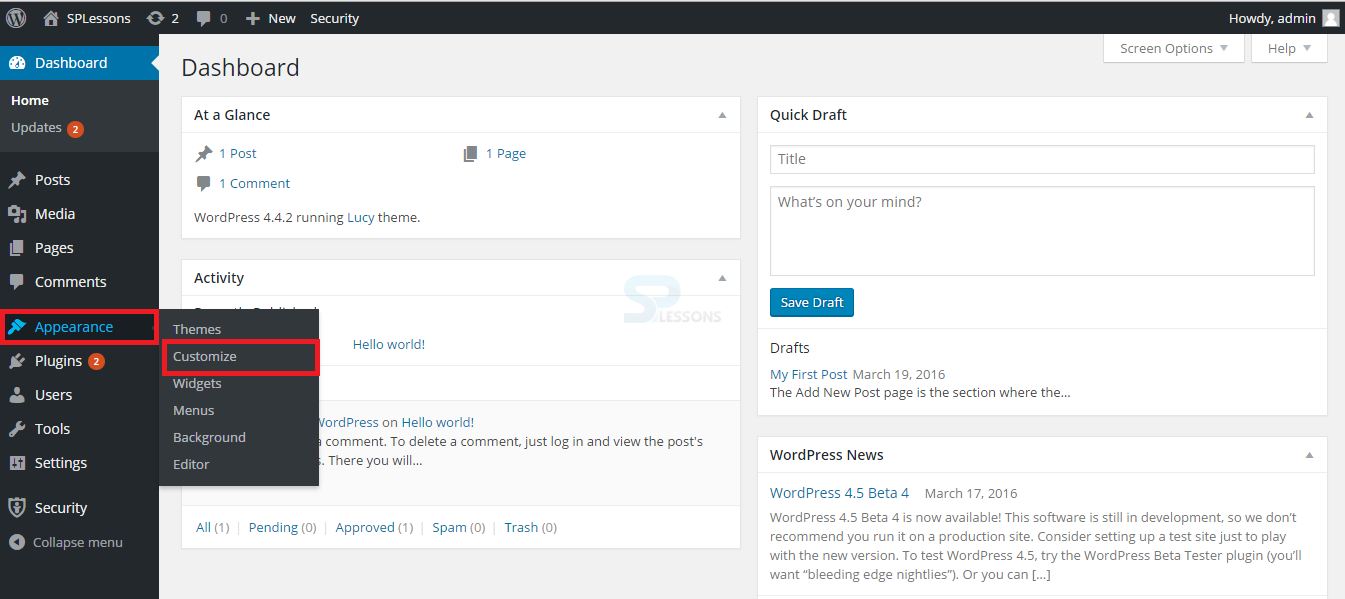
In order to customize the page, go to the Appearance window -> and select Customization as shown in the image below:
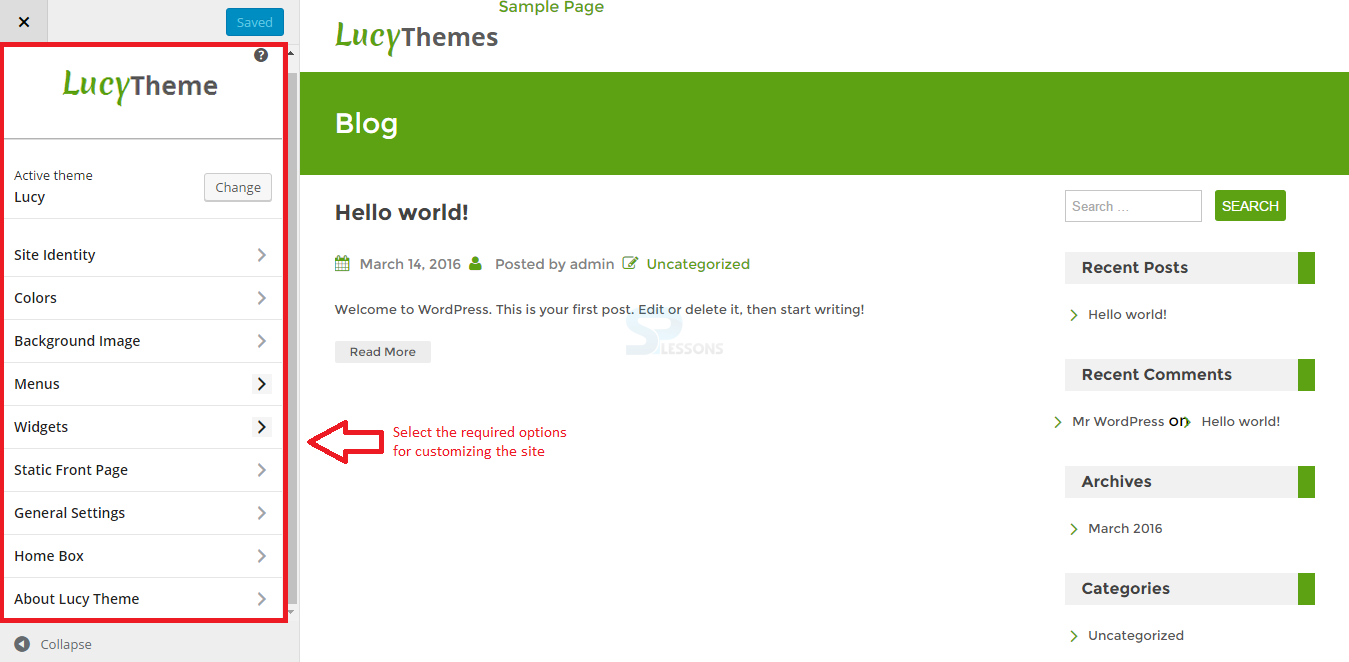
 Now, a page with options to customize the site structure will appear as shown in the image below:
Description
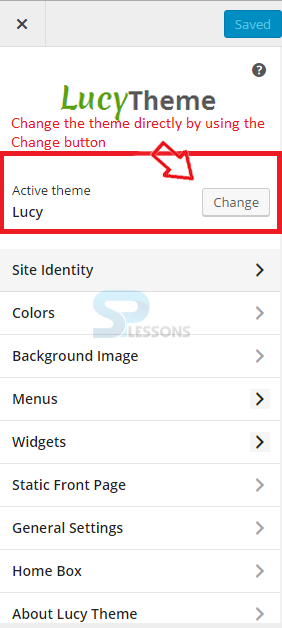
The current theme can be changed using the Change button in the Active theme section as shown in the image below:
Description
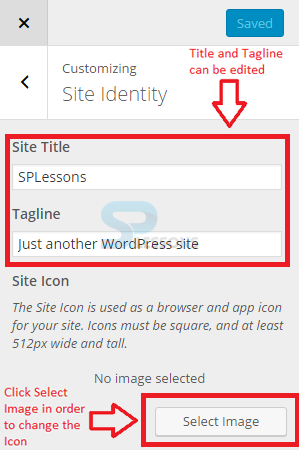
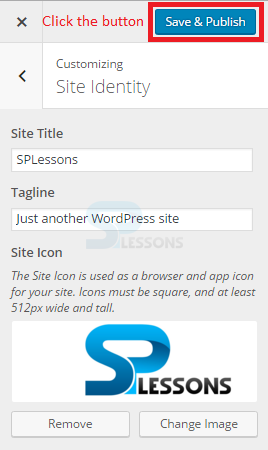
The Site Identity is used to edit the main Site Title and the Tagline. The site icon can be changed using the Select Image button as shown in the image below:
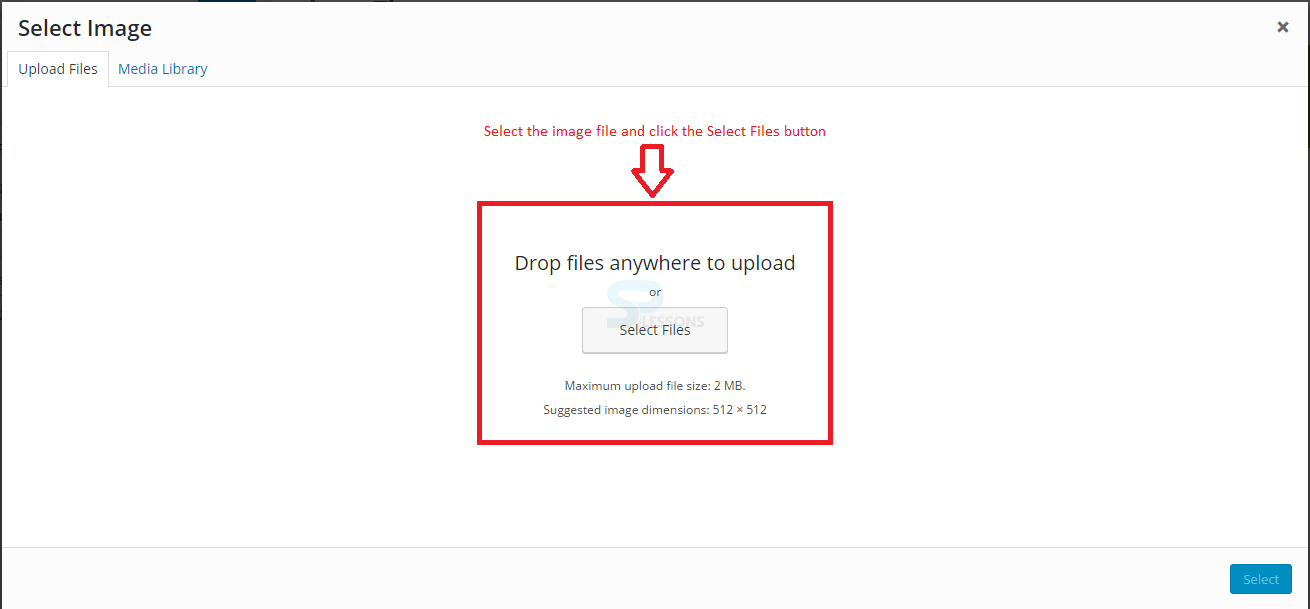
 Now, a page with options to select a image from the local drive appears. Click the Select File button as shown in the image below:
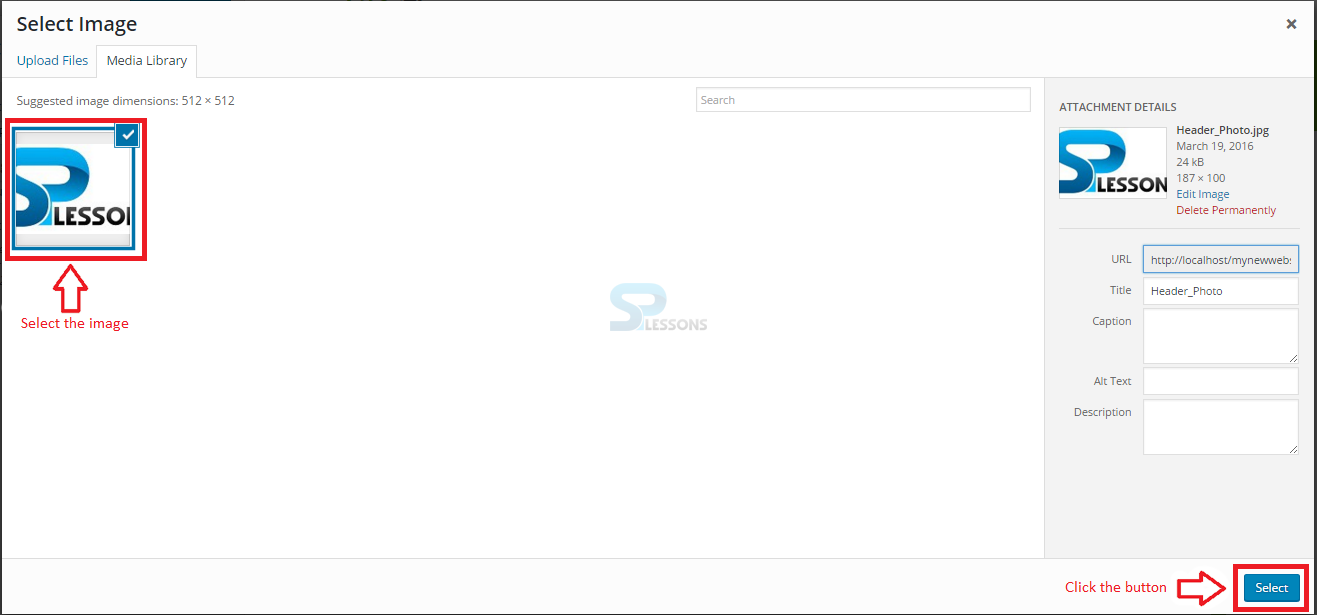
 Upload the image file and select the image. Click Select button in Media Library section as shown in the image below:
 Now, the page with a cropping option appears. Crop the image and the page will redirect to the Site Identity. Proceed by clicking the Save & Publish button as shown in the image below:
Description
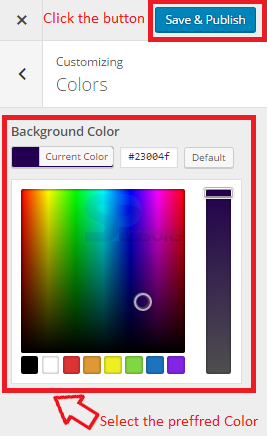
Colors can be customized based on the themes. Each theme contains different set of options in WordPress. In order to change the theme color, go to the Color section in the Customization section and select the preferred color and click the Save & Publish.
Description
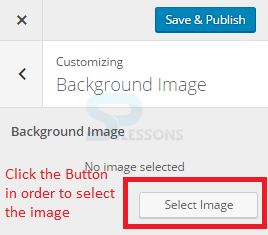
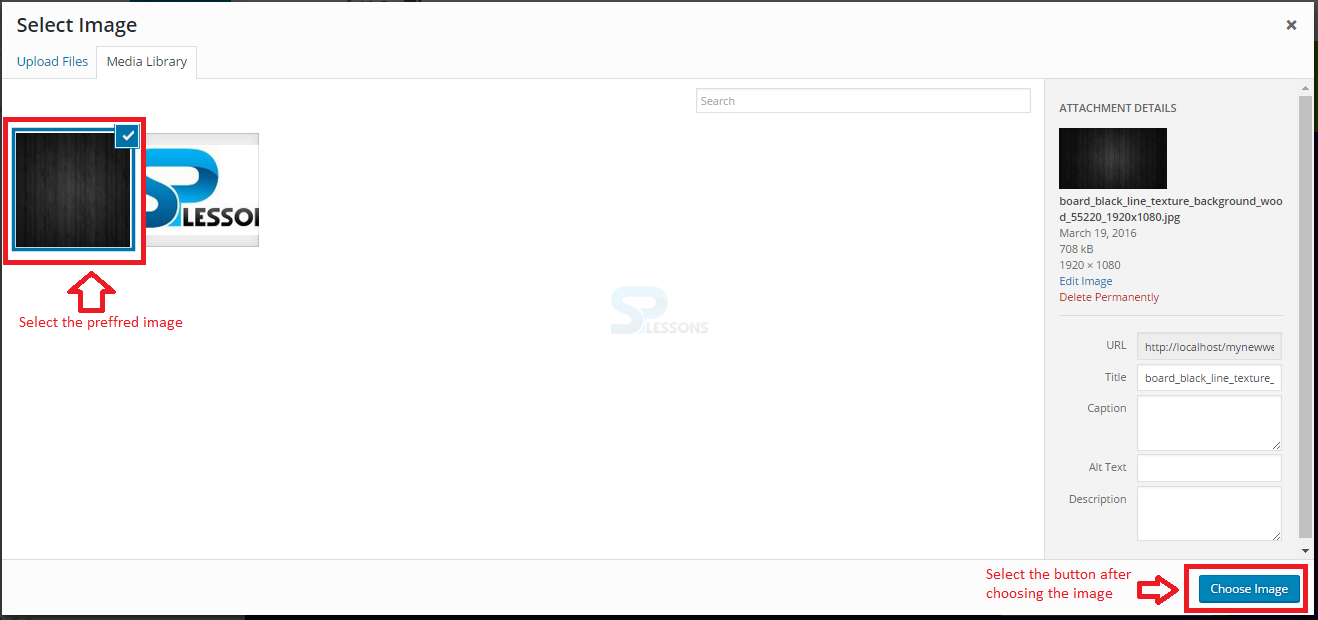
A background image for the site can be set using the Background Image section. Select the image by clicking the Select Image button as shown in the image below:
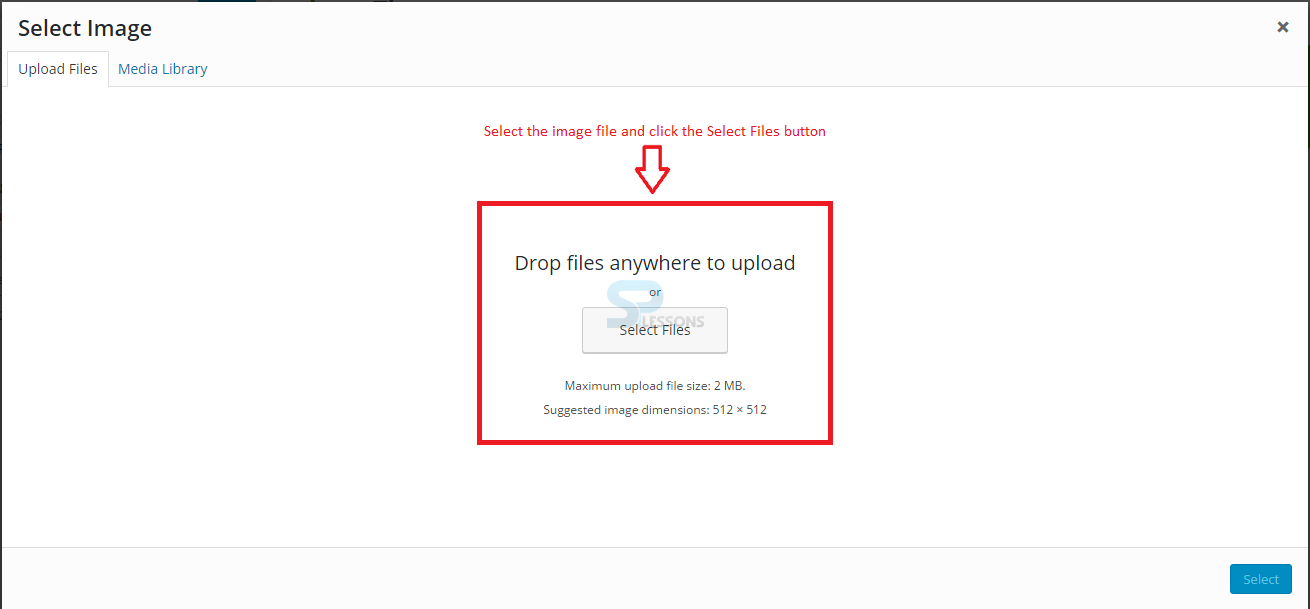
 By clicking the Select Image button, a page with options for selecting the image file appears as shown in the image below:
 Select uploaded image from Media Library and proceed by clicking Choose Image button as shown in the image below:
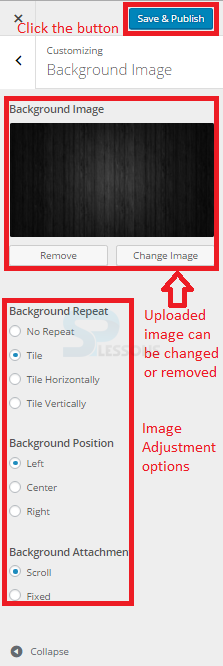
 Now, a Navigation Menu appears on the left hand side of the screen with some options for adjusting the image. After making all the adjustments, click the button Save & Publish as shown in the image below:
Description
Customization Menus are added in WordPress 3.0. Earlier, menus had to be hard-coded, built into the theme or created using a page list function. Like widgets, custom menus are built simply. The Menus page has several areas where a user can add the content of different types. Content can be organized after adding, even nesting menus can be added into sub-menus.
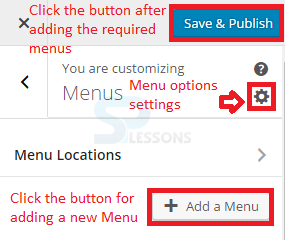
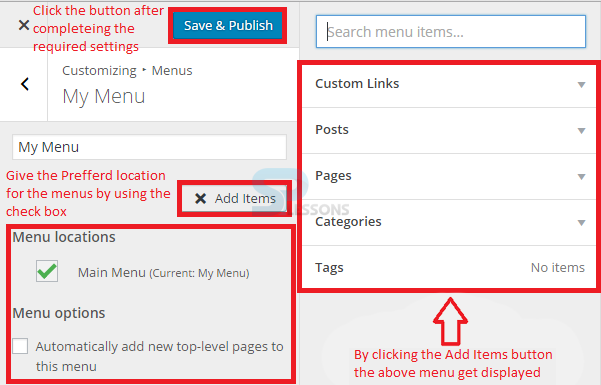
In order to add a new menu, go to Customization section ->. Select Menu tab -> and click Add a Menu button as shown in the below image:
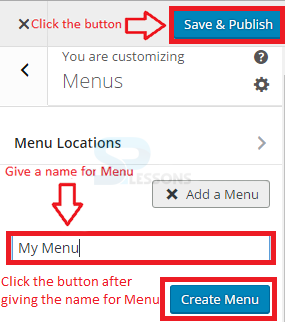
 Now, the navigation menu on the left hand side displays an option and a Create Menu button for creating menu name as shown in the image below:
 Custom menus contain links to pages, categories, custom links, Posts and Tags or other content types and can create as many menus as required. But, the ones that are active on the site are the ones that have been assigned to specific menu areas in the Theme Location section. The image below displays the menu settings for the added menu.
Description
Widgets are the display things like recent posts, an RSS feed, a custom menu or any of numerous other things added by plugins like author profiles. Widgets consist of two sections, they are:
The image below displays the Widgets tab on the Customization section.
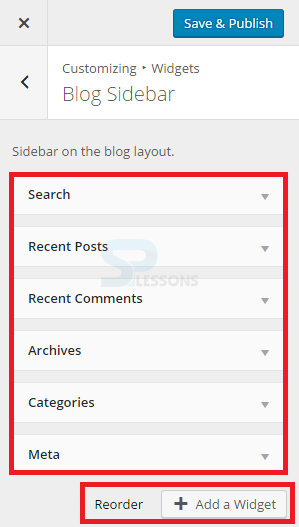
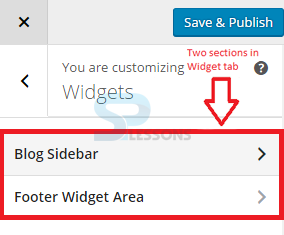 Blog Sidebar
Clicking the Blog Sidebar gives a list of widgets that are to be displayed at the Footer section of the site. The Widgets can be Reorder and a new widget can be added using the ADD a Widget button. The image below displays the Blog Sidebar section in Widgets.
Blog Sidebar
Clicking the Blog Sidebar gives a list of widgets that are to be displayed at the Footer section of the site. The Widgets can be Reorder and a new widget can be added using the ADD a Widget button. The image below displays the Blog Sidebar section in Widgets.
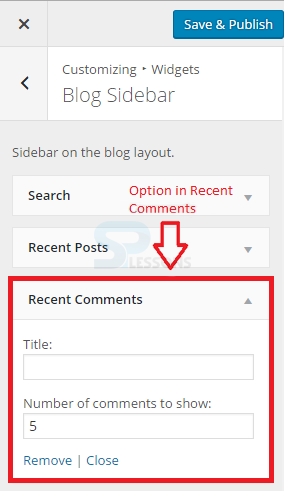
 Each widget in this section contains some options, for example the Recent Comments option contains a Title space and Number of Comments. All the added things can be removed using the Remove option as shown in the image below:
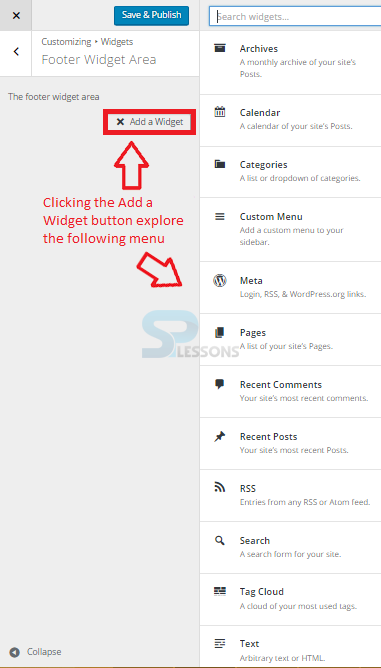
 Footer Widget Area
The Footer Widget Area contains the navigation menu. By clicking the Add a Widget button, the section displays a side navigation menu as shown in the image below:
Footer Widget Area
The Footer Widget Area contains the navigation menu. By clicking the Add a Widget button, the section displays a side navigation menu as shown in the image below:
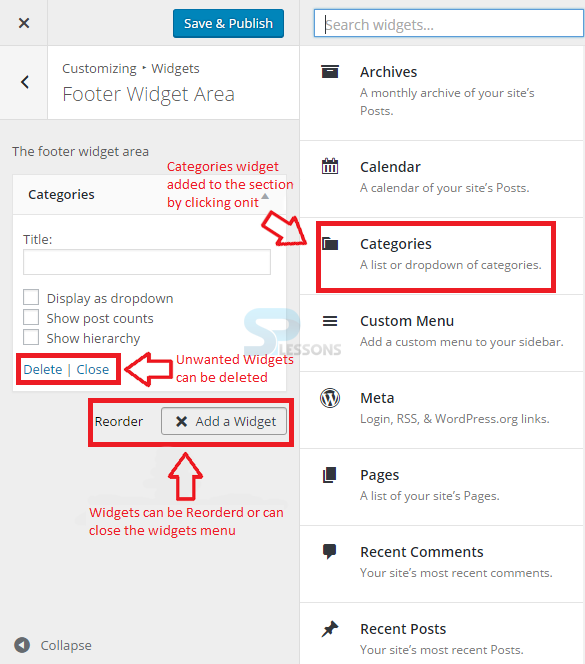
 By clicking the preferred menu, the Widget gets added to the footer part and can be deleted if required using the Delete option as shown below:
- Blog Sidebar
- Footer Widget Area
Description
Static Front Page section contains two sub sections as follows:
By default, the supported page is mentioned above and user can choose either a Your latest post or A static page for the site as shown in the image below.
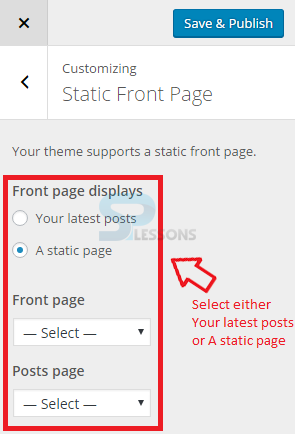
- Your latest posts
- A static page
Description
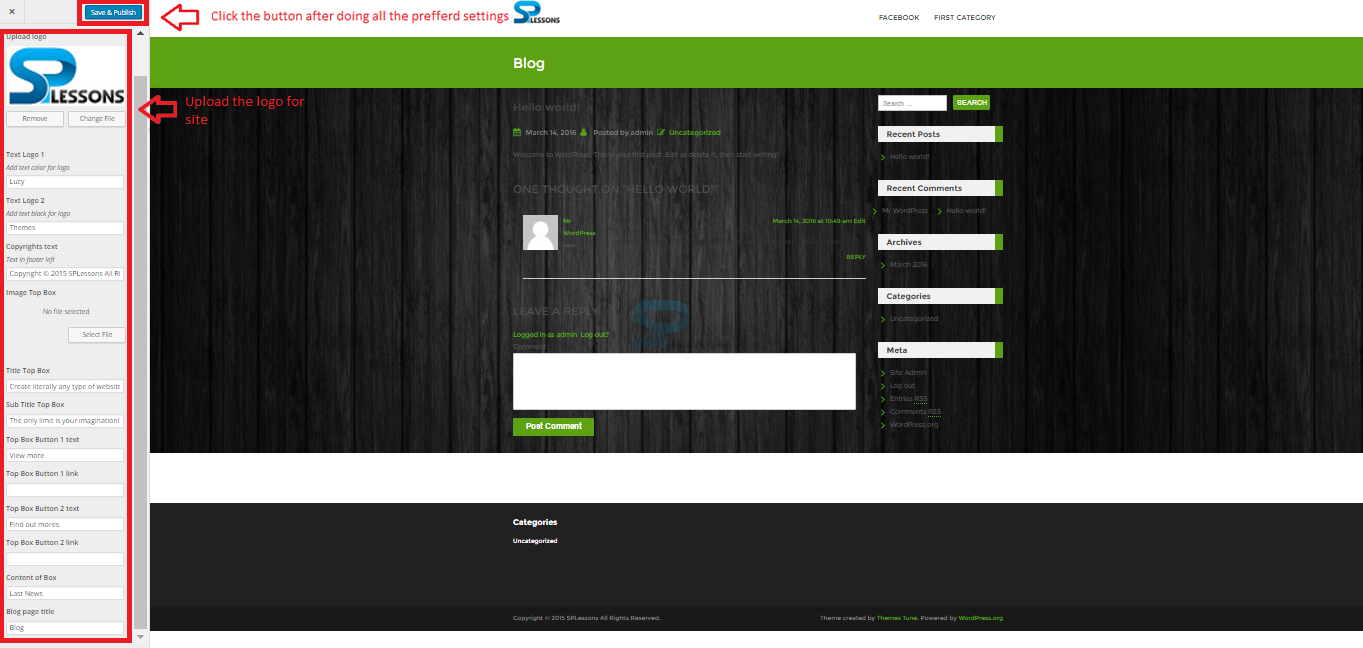
The General Settings are provided with options like setting a logo and upload a logo. By using the Select File button, users can upload or select the image from Media Library.
Users can even do some general settings to the website like changing the Blog page title, providing links to each box and more. After making all the required changes, proceed by clicking Save and Publish button as shown in the image below:
Description
Using Home Box, users can set some icons like Bookmarks, and mobile. Icons can be selected easily and used. Select the preferred Font icon from the Font Awesome website and simply enter the code in Home Box section.
The image below displays the Home Box section in the Customization widget.

Description
In Widgets section, users can set and customize widgets that appear on the site. Widgets can go in the sidebar or anywhere supported by the theme and can display things like Recent posts, an RSS feed, a custom menu or any other things added by plugins, like author profiles or Twitter feed. Widgets can be updated live as well, so as soon as the user clicks the Save button, those changes are saved. Any widget can be dragged, dropped, positioned and saved.
The inactive widgets area is the section where the user can disable the widgets, but wants to save the settings. While switching themes to a theme that supports fewer widget areas, some of the widgets can be placed here. The image below displays the Widget section:
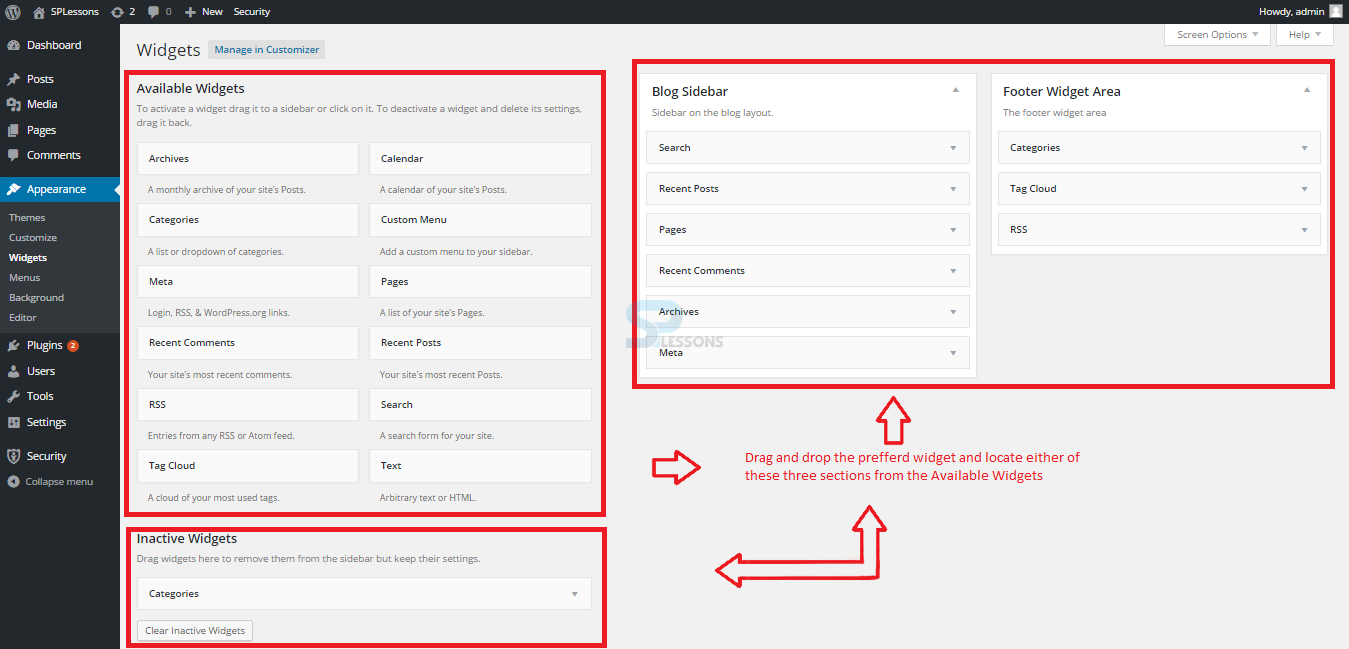 The default widgets that are built into WordPress are as follows:
- Calendar, which displays a calendar view for the posts.
- Meta, which displays both Login/Logout links.
- RSS, which displays an RSS feed from a specified RSS URL.
- Text, which displays any text or basic HTML.
- Categories, which displays a list of categories in either a list or dropdown format.
- Pages, which displays a list of all pages on the site in a hierarchical order based on page order.
- Archives, which displays either a list or drop down of post archives by month.
- Custom menu, which displays a set custom menu from the Menu page.
- Recent Comments, which displays a customizable list of most recent comments.
- Search, which displays a search box on the site.
- Recent Posts, which displays a customizable list of most recent posts.
- Tag Cloud, which displays all the most frequently used tags in a tag cloud format with most used tags being larger.
Description
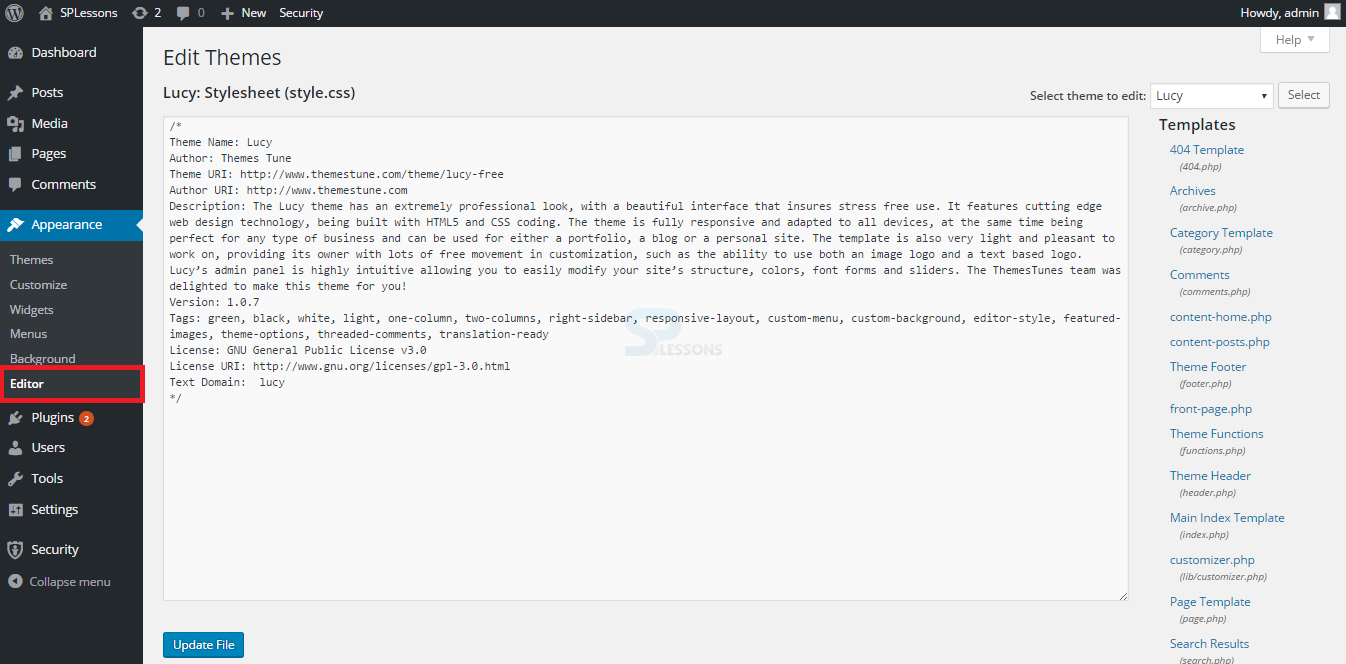
Like the Plugin menu, the Appearance menu has an editor to make quick code changes to the theme. It is recommended not to do this because themes get updates just like plugins in Core WordPress. So, any changes made in the theme in the Code Editor will be lost while updating.
Key Points
- Themes are used to add styles to the WordPress site visually and provide different functionality for presenting the content.
- A huge number of themes are available in WordPress official website, which can be easily installed.
- Themes can either installed from WordPress site or uploaded by downloading the themes .Zip file.