


 Introduction
The current chapter explains ANT installation process. To install ANT, one should have a machine with Java Development Kit of at-least 1.5 version or the later.
Step-1
To download JDK, click on the below tag that demonstrates the installation process of JDK.
Download JDK
Step-2
Users who do not have Windows OS can download the source files and build it directly. Below link shows how to download and build the source files directly.
http://ant.apache.org/manual/install.html
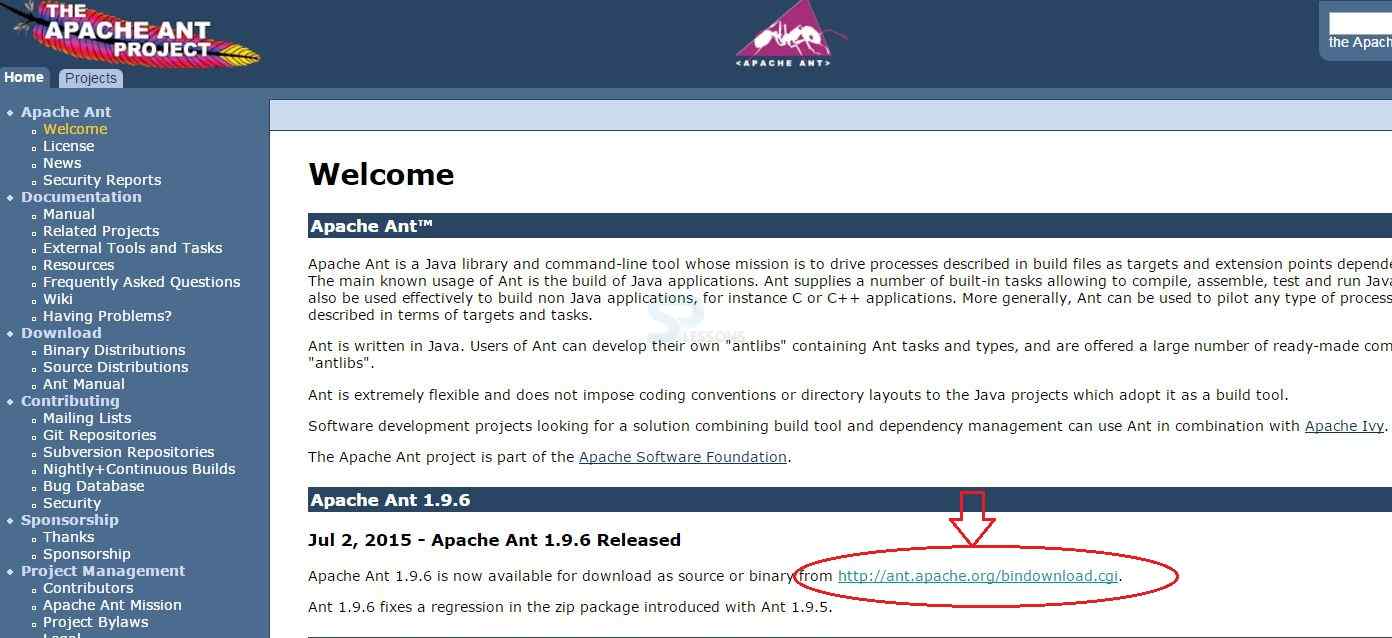
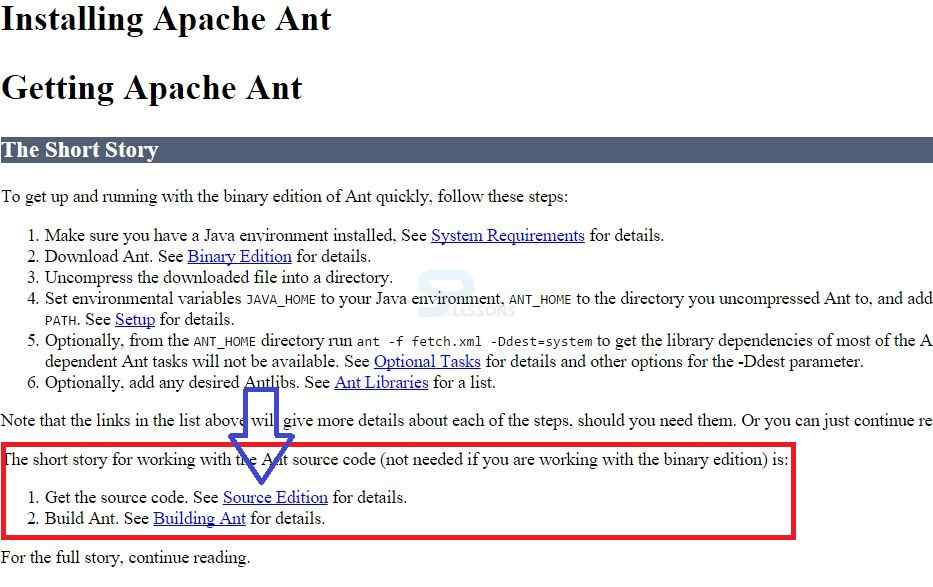 Otherwise, click the below link to download the Binary File for Windows OS and follow as shown in the below figure.
http://ant.apache.org/
Otherwise, click the below link to download the Binary File for Windows OS and follow as shown in the below figure.
http://ant.apache.org/
Step-3
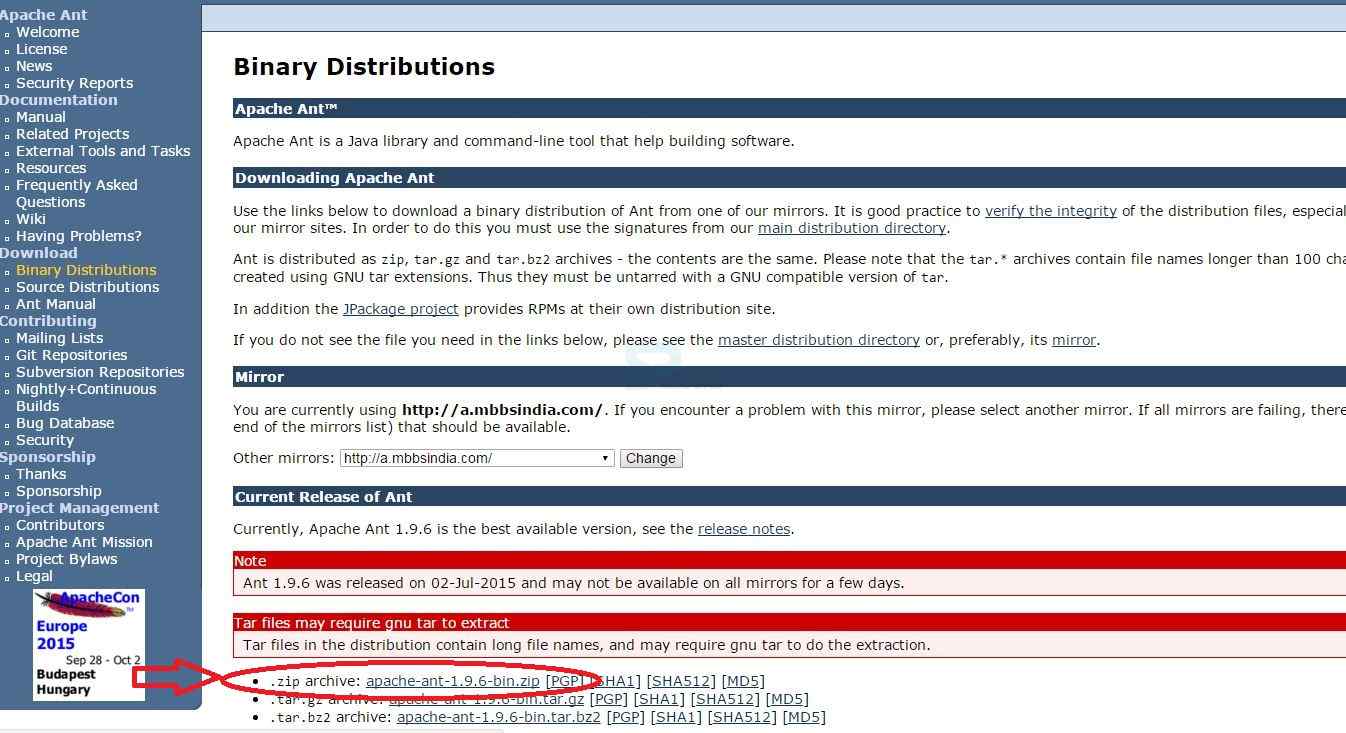
After downloading, extract the zip file so that one can see the folder like apache-ant-1.9.6.
Now, create a system variable and set the path by following the below instructions:
Go to My Computer -> Right click on My Computer -> Properties -> Advance System Settings
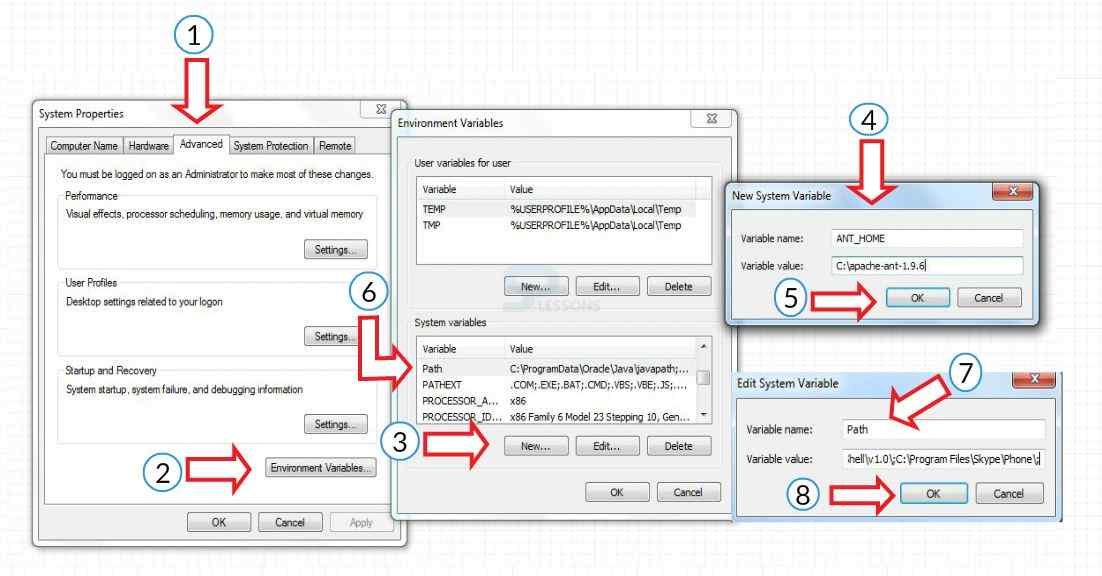 Go to
(1)Advanced
(2) Click on Environment Variables.
(3) In System Variables, Click on New.
(4) Enter the Variable Name: ANT_HOME and Variable Value : C:\apache-ant-1.9.6
(5) Click on OK.
(6) Set the path for ANT by double clicking on the Path in System Variable.
(7) Put semicolon(;) before entering the path. This path will be in ANT bin folder. The path looks like C:\apache-ant-1.9.6\bin
(8) Click on OK.
Now, the installation process of ANT is completed.
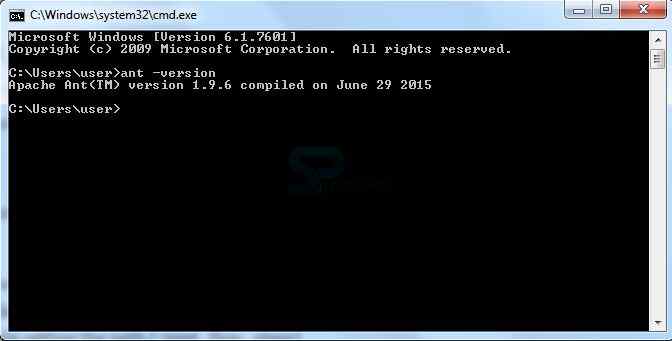
To check whether the installation is successful, go to the Command Prompt and enter ant -version.The following output appears if the installation process is successful, else, an error will be shown.
Go to
(1)Advanced
(2) Click on Environment Variables.
(3) In System Variables, Click on New.
(4) Enter the Variable Name: ANT_HOME and Variable Value : C:\apache-ant-1.9.6
(5) Click on OK.
(6) Set the path for ANT by double clicking on the Path in System Variable.
(7) Put semicolon(;) before entering the path. This path will be in ANT bin folder. The path looks like C:\apache-ant-1.9.6\bin
(8) Click on OK.
Now, the installation process of ANT is completed.
To check whether the installation is successful, go to the Command Prompt and enter ant -version.The following output appears if the installation process is successful, else, an error will be shown.
Description
To check whether the Java is configured or not in Ubuntu, use the below command:
[java]echo $JAVA_HOME[/java]
The result gives the path of JAVA
To check whether the path is configured or not, use the below command:
[java]echo $PATH[/java]
The download process is same in Ubuntu i.e. zip file has to be downloaded. The downloaded file has to be extracted.
Step-1
Now, to configure ANT HOME and ANT PATH, use any of the below directories:
Here, usr directory is being used. So, move the ant file into usr directory using the command.
[java]Sudo mv apache-ant-1.9.4 /usr/apache/[/java]
- usr directory
- opt directory
Step-2
ANT_HOME is directly configured in command prompt as shown below
[java]export ANT_HOME=/usr/apache/apache-ant-1.9.4/[/java]
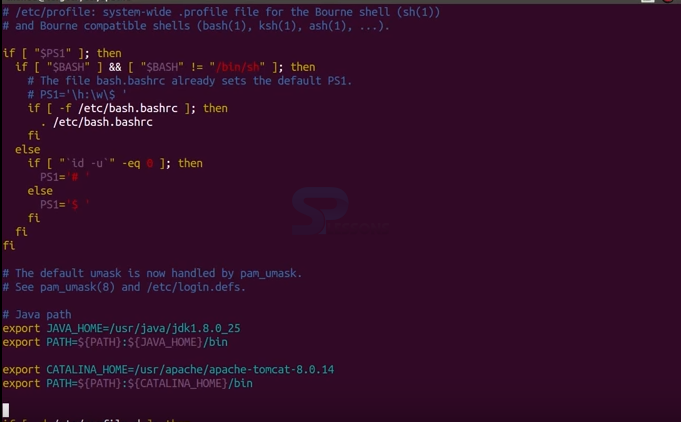
It won't make any sense and is limited to the current terminal only. To overcome this, configure globally using profile file which will be under etc directory.
[java]sudo vim /etc/profile[/java]
The following screen appears:
 Now enter
[java]export ANT_HOME=usr/apache/apache-ant-1.9.4
export PATH=$(PATH):$(ANT_HOME)/bin[/java]
Now enter
[java]export ANT_HOME=usr/apache/apache-ant-1.9.4
export PATH=$(PATH):$(ANT_HOME)/bin[/java]
Step-3
To update this file into the system, use source command as shown below:
[java]source /etc/profile[/java]
Now, check home and path configurations
[java]echo $ANT_HOME
echo $PATH[/java]
To check whether ANT is installed or not, enter
[java]ant[/java]
The following appears if the installation process is successful.

Description
Classpath sets the location of user-defined packages and classes. ANT Classpath has two attributes, they are:
- Classpath
- Classpathref
Points
- Installing JDK is important for ANT.
- ANT Binary File has to be downloaded for Windows OS.
Programming Tips
- ANT Installation should be done depending on the existing machine operating system.
- Setting a path for the created variable is important.
- Do not forget to add semicolon while setting the path.