


 Introduction
This chapter demonstrate about the JUnit Ant which is a Java based build to designed by Apache Software Foundation and widely used to build systems in many Java projects. ANT stands for Another Neat tool. Working of JUnit with Ant is a very easy task and Following are the concepts.
- History Of Ant
- Environment Setup
- Ant With Eclipse Integration
- Ant with JUnit Integration
Description
Ant was developed to overcome the problem related with Apache Make tool. James Duncan Davidson developed Ant which was bundled part of tomcat distribution. Year 2000 was the proposed year of Ant and the latest version 1.9.7 of Apache Ant was released on Apr 12, 2016.
Description
In order to get the Ant go to the official page of Apache Ant.
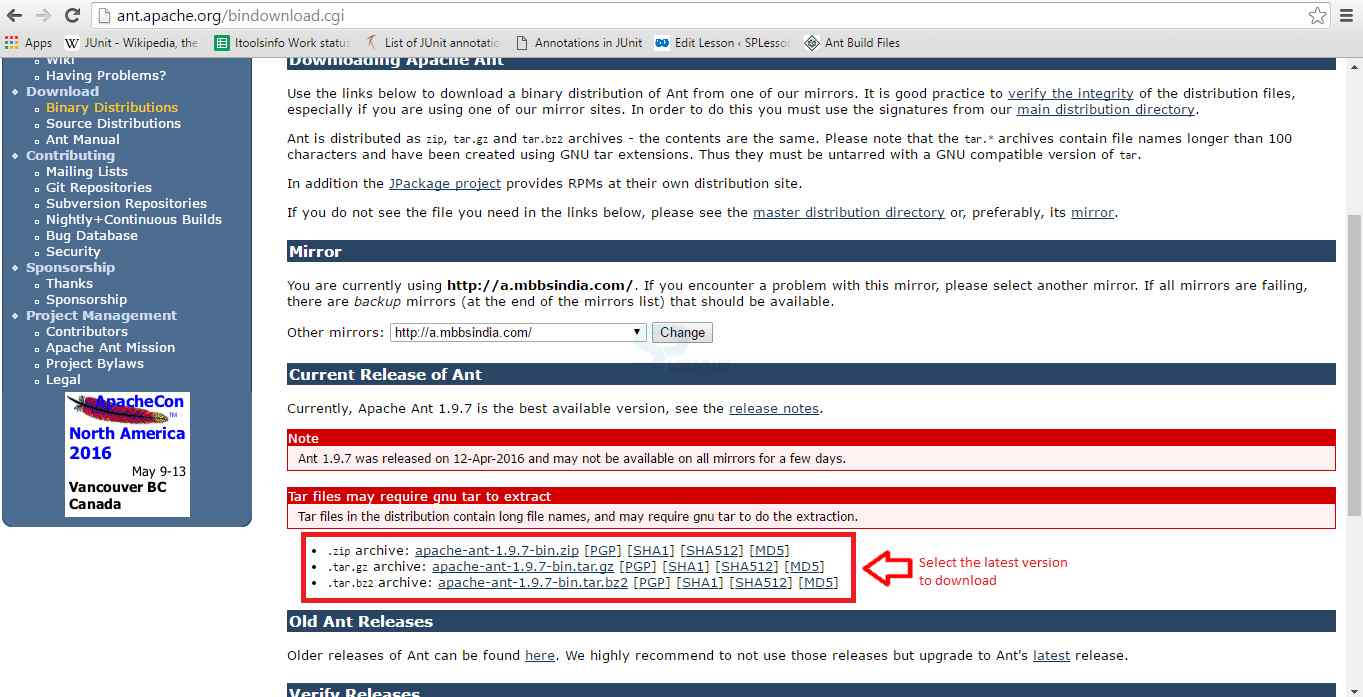
The page appears known as Apache Ant home page. Provided with some information click on the latest version of Apache Ant as shown in the below image.
 Now the page redirect to another page providing various types of files with various versions of Apache Ant, select the preferred version of downloading as shown in below image.
 Select the appropriate location and Unzip the file.
Description
Build Files also known as build.Xml and are at base directory of the project file there are restriction for file name or location. The below snippet code demonstrate the build.xml file.
[c]<?xml version="1.0"?>
<project name="SPLessons Project" default="info">
<target name="info">
<echo><SPLessons - Welcome to Apache Ant!></echo>
</target>
</project>
[/c]
The below table demonstrate the Attributes and their description.
| Attribute | Description |
|---|---|
| Name | Indicates name of the project and is optional. |
| basedir | Indicates base directory of project and is optional. |
| default | The default targets of the project is specified by these attributes and is mandatory. |
Description
Eclipse get ready by download and installing Eclipse. By default Eclipse comes with pre plugin of Ant. The steps below demonstrate the integration of Ant with Eclipse.
Step 1
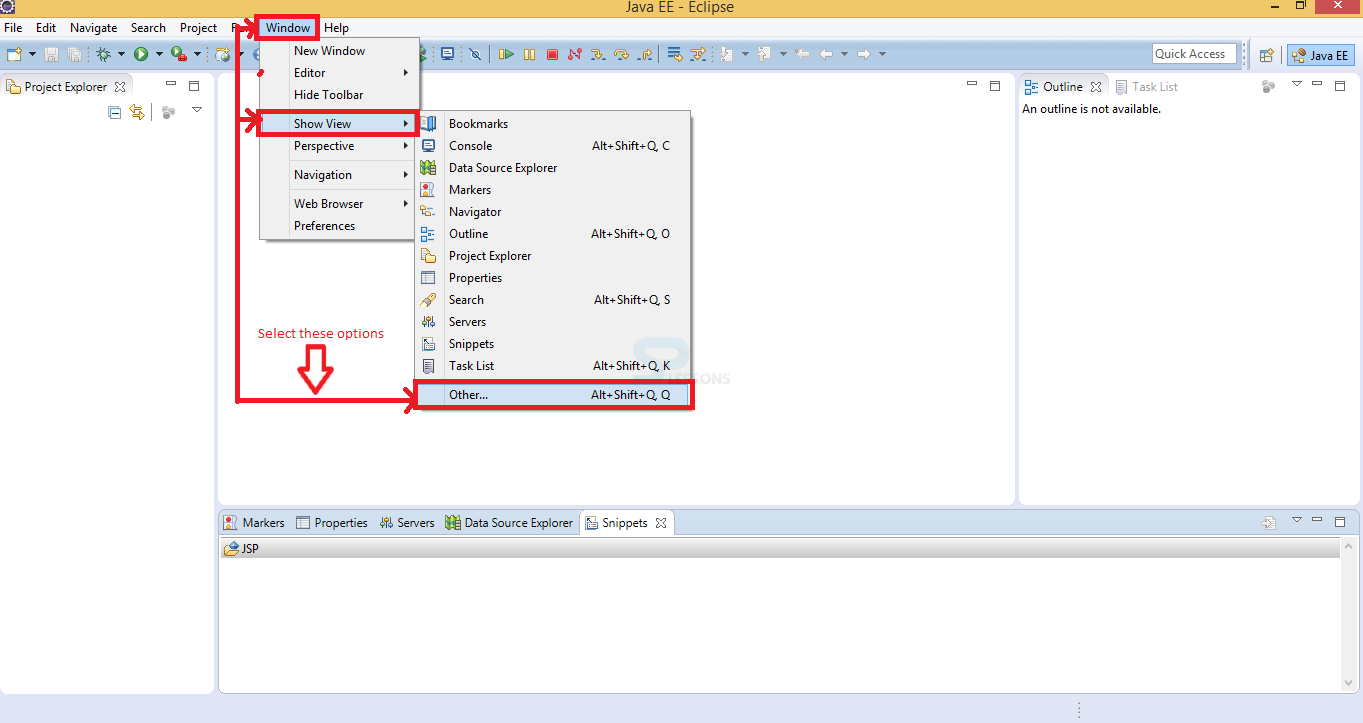
Open and select the Window menu - >select Show View - > click Others as shown in below image.
Step 2
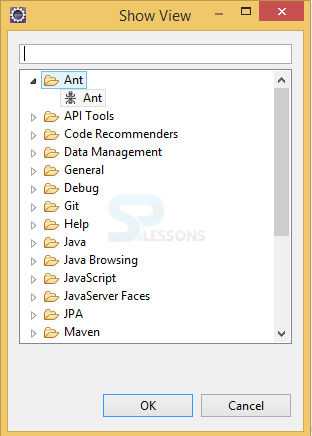
Now a pop window appear known as Show View providing some options select Ant and proceed by clicking Ok button.
Description
JUnit testing mainly used for Java based development projects. The JUnit official page contains various extensions the table below demonstrate some of the attributes.
The steps below demonstrates creating Ant project and its working.
| attributes | Description |
|---|---|
| dir | JVM invoking directory. When Fork is disabled this is ignored. |
| jvm | The command is used for invoking jvm and is ignored when the fork is disabled. |
| failure property | In order to get JUnit failure the name of the property to set. |
| errorproperty | In order to get JUnit error name |
| Fork | Fork is used to run the testing in a seperate jvm. |
| printsummary | Which Advise Ant to indicate direcet estimation for each test |
| tempdir | Way to the internal document that Ant will utilize |
| timeout | Exits the tests that take more time to keep running than this setting |
| haltonfailure | When failure occurs it will stop the execution |
| haltonerror | When a test error occurs it will stop the execution |
| showoutput | Which Advise Ant to send the output for each test |
Step 1
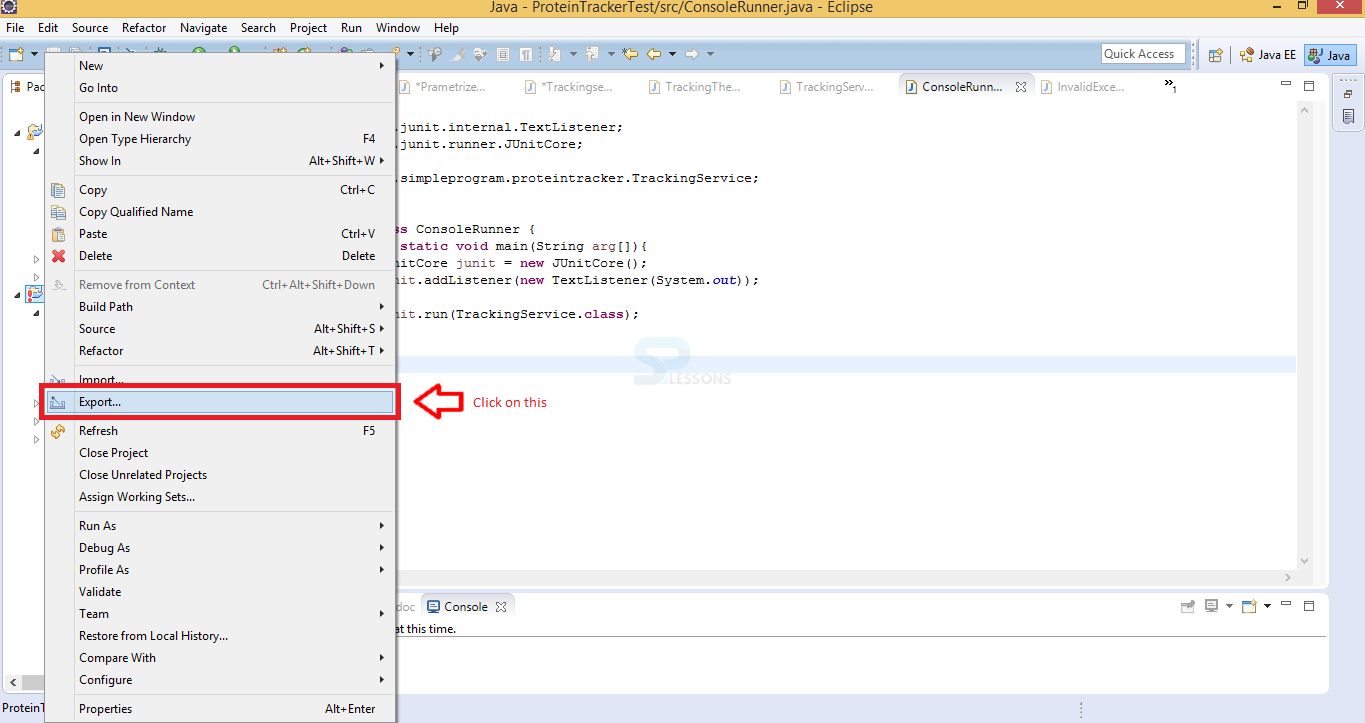
In order to build the files initially user need to export Ant Buildfiles. Follow the procedure mentioned below
Right Click on the project - > Select Export as shown in the below image.
Step 2
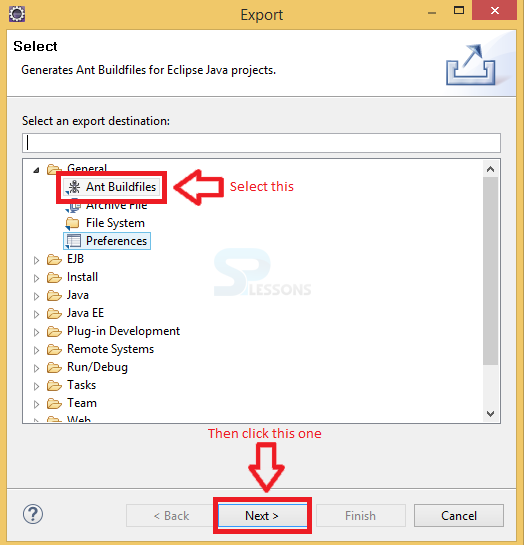
Now a window appears knowing as Export providing some options select the Ant Build files and proceed by selecting Next as shown in below image.
Step 3
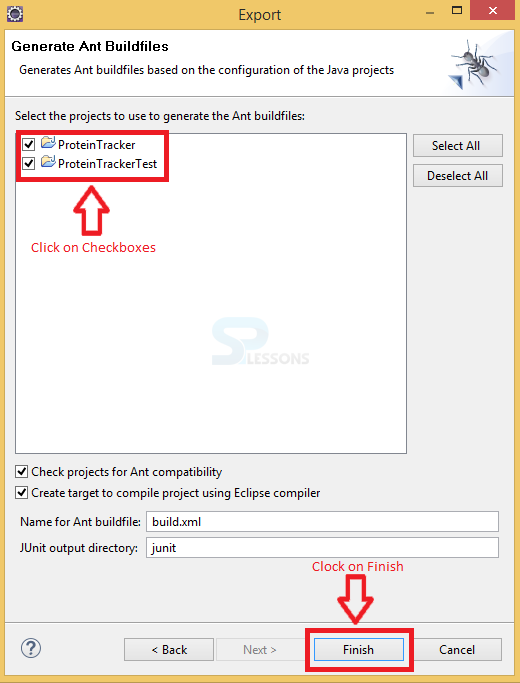
The window redirects and provide the list of projects select the preferred projects by ticking check boxes and proceed by clicking Finish button as shown in below image.
Step 4
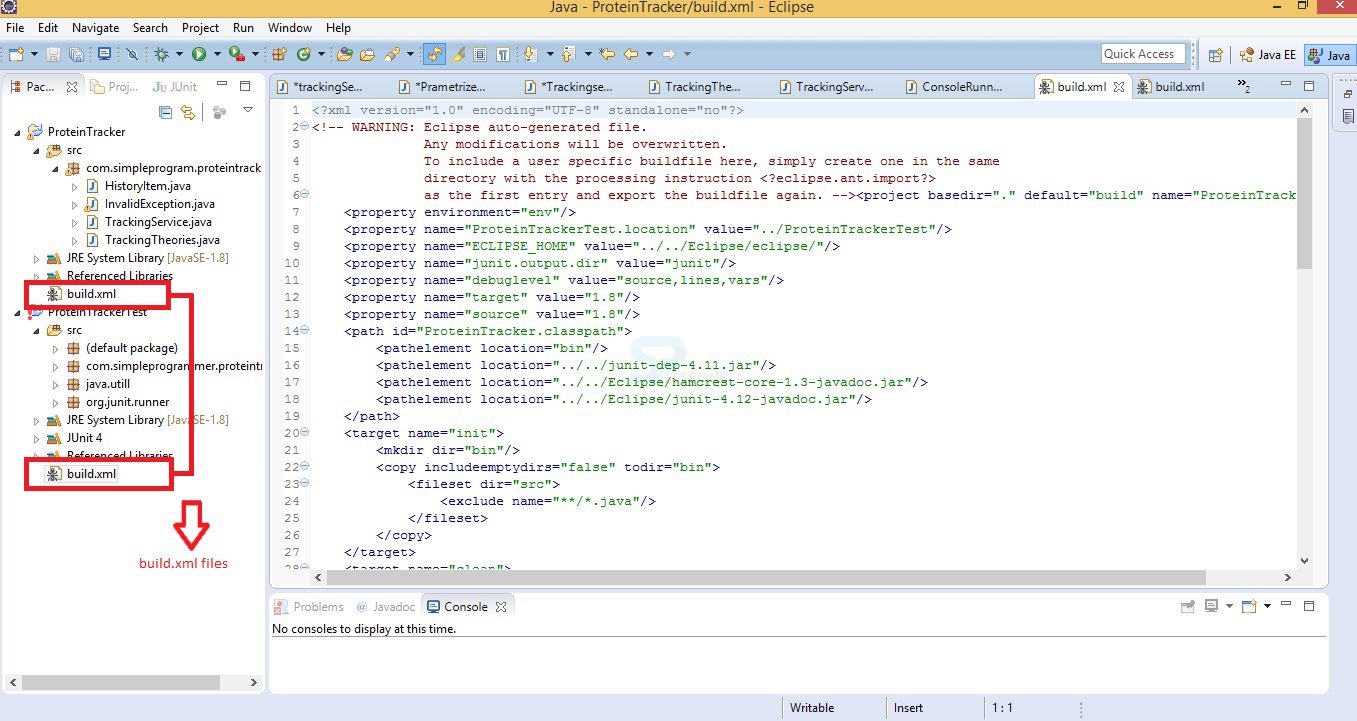
Two build files get generated below the projects known as build.xml files as shown in the below image.
Step 5
The code below demonstrate build.xml files.
[c]
<?xml version="1.0" encoding="UTF-8" standalone="no"?>
<!-- WARNING: Eclipse auto-generated file.
Any modifications will be overwritten.
To include a user specific buildfile here, simply create one in the same
directory with the processing instruction <?eclipse.ant.import?>
as the first entry and export the buildfile again. --><project basedir="." default="build" name="ProteinTracker">
<property environment="env"/>
<property name="ProteinTrackerTest.location" value="../ProteinTrackerTest"/>
<property name="ECLIPSE_HOME" value="../../Eclipse/eclipse/"/>
<property name="junit.output.dir" value="junit"/>
<property name="debuglevel" value="source,lines,vars"/>
<property name="target" value="1.8"/>
<property name="source" value="1.8"/>
<path id="ProteinTracker.classpath">
<pathelement location="bin"/>
<pathelement location="../../junit-dep-4.11.jar"/>
<pathelement location="../../Eclipse/hamcrest-core-1.3-javadoc.jar"/>
<pathelement location="../../Eclipse/junit-4.12-javadoc.jar"/>
</path>
<target name="init">
<mkdir dir="bin"/>
<copy includeemptydirs="false" todir="bin">
<fileset dir="src">
<exclude name="**/*.java"/>
</fileset>
</copy>
</target>
<target name="clean">
<delete dir="bin"/>
</target>
<target depends="clean" name="cleanall"/>
<target depends="build-subprojects,build-project" name="build"/>
<target name="build-subprojects"/>
<target depends="init" name="build-project">
<echo message="${ant.project.name}: ${ant.file}"/>
<javac debug="true" debuglevel="${debuglevel}" destdir="bin" includeantruntime="false" source="${source}" target="${target}">
<src path="src"/>
<lt;classpath refid="ProteinTracker.classpath"/>
</javac>
</target>
<target description="Build all projects which reference this project. Useful to propagate changes." name="build-refprojects">
<ant antfile="build.xml" dir="${ProteinTrackerTest.location}" inheritAll="false" target="clean">
<ant antfile="build.xml" dir="${ProteinTrackerTest.location}" inheritAll="false" target="build">
<propertyset>
<lt;propertyref name="build.compiler"/>
</propertyset>
</ant>
</target<
<target description="copy Eclipse compiler jars to ant lib directory" name="init-eclipse-compiler">
<copy todir="${ant.library.dir}">
<fileset dir="${ECLIPSE_HOME}/plugins" includes="org.eclipse.jdt.core_*.jar"/>
</copy>
<unzip dest="${ant.library.dir}">
<patternset includes="jdtCompilerAdapter.jar"/>
<fileset dir="${ECLIPSE_HOME}/plugins" includes="org.eclipse.jdt.core_*.jar"/>
</unzip>
</target&>
<target description="compile project with Eclipse compiler" name="build-eclipse-compiler">
<property name="build.compiler" value="org.eclipse.jdt.core.JDTCompilerAdapter"/>
<antcall target="build"/>
</target>
<target name="TrackingTheories">
<mkdir dir="${junit.output.dir}"/>
<junit fork="yes" printsummary="withOutAndErr">
<formatter type="xml"/>
<test name="com.simpleprogram.proteintracker.TrackingTheories" todir="${junit.output.dir}"/>
<classpath refid="ProteinTracker.classpath"/>
</junit>
</target>
<target name="junitreport">
<junitreport todir="${junit.output.dir}">
<fileset dir="${junit.output.dir}">
<include name="TEST-*.xml"/>
</fileset>
< format="frames" todir="${junit.output.dir}"/>
</junitreport>
</target>
</project>
[/c]
Step 6
In order To run the project
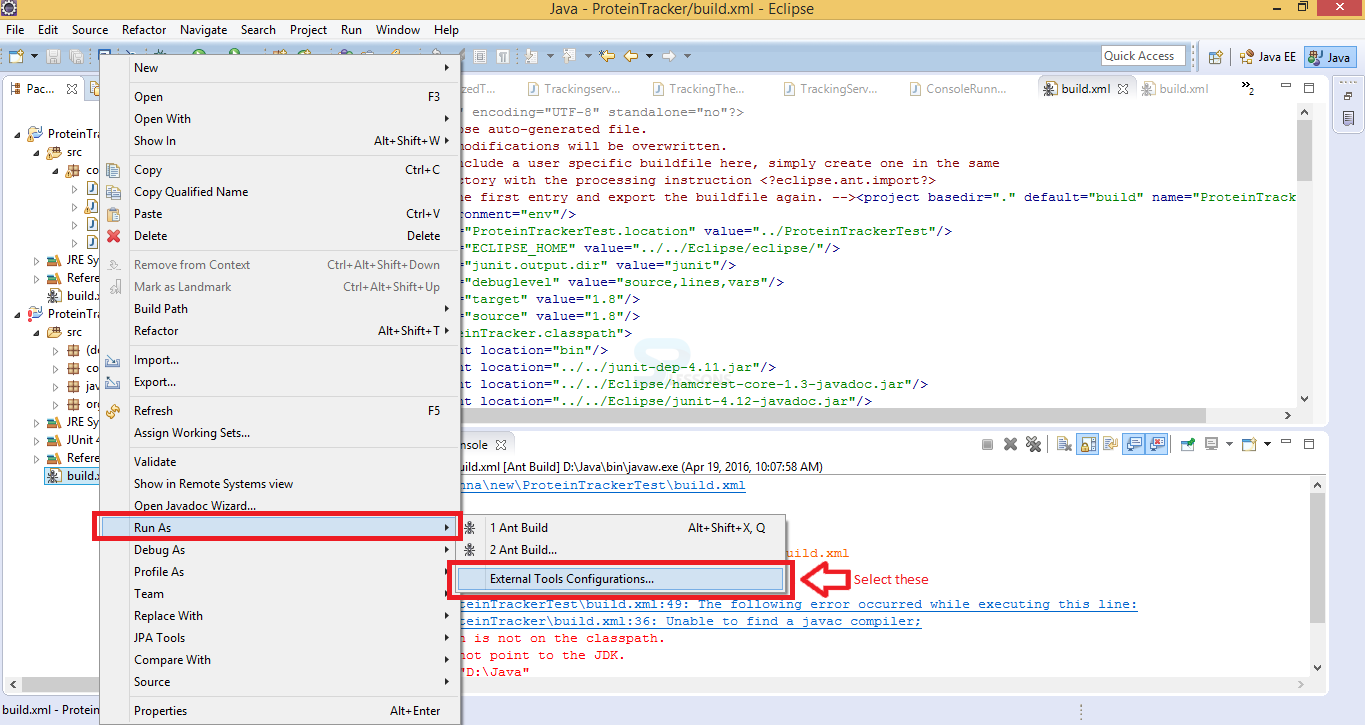
Right click on the build.xml files - > select Run As - > select External Tools Configuration as shown in below image.
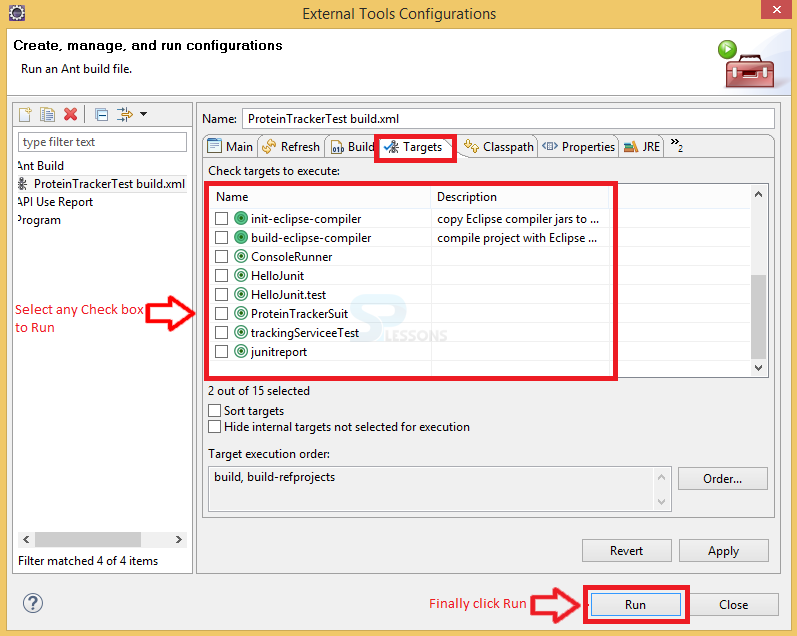
Step 7
Now a pop up window appear known as External Tool Configuration providing some options. Select the Targets and click on the targeted program check box provided and proceed by clicking Run button.
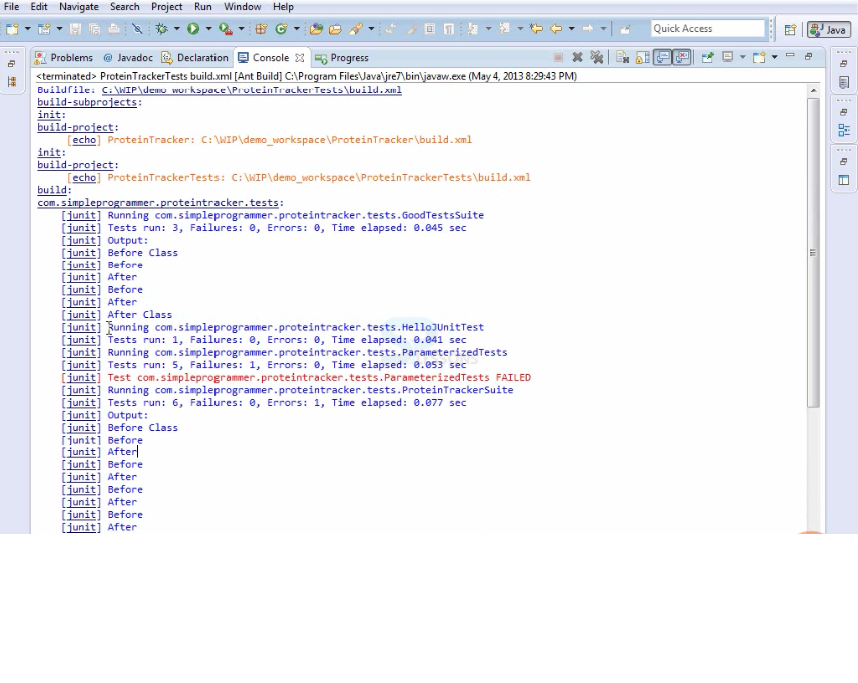
Step8
Finally the code get run and produce the output and provide information about test and its performance as shown in the below image.
Key Points
- JUnit Ant is the replacement for the Unix make build tool.
- JUnit Ant provides interface to develop to custom tasks.
- JUnit Ant is certified with by the open source initiative.
- JUnit Ant is combination with Apache Ivy.