


 Introduction
This chapter gives an overview about WordPress Pages and explains how to create a Page. WordPress allows users to create Pages for the content to provide some information about the blog. The following concepts are covered in this chapter:
- Pages
- Difference between Posts and Pages
- Creating a page
Description
Pages are static and are not recorded by date. Pages don't use Tags or Categories. An About page is the classic example. Pages can be shown in the sidebar using the Pages gadget, and a few subjects show pages in tabs at the top of the online blog. If client has 50 pages, using the Pages gadget all the pages can be recorded constantly.
WordPress allows client to create custom page templates using the theme that permits designers to customize the look of every page if required. In many themes, posts and pages will be similar to each other. But, if a client wants to create a presentation page or display page, then this custom page layouts is useful.
Description
Pages have a feature called Order, which gives the user a chance to modify the order of pages by giving out a number to it. However, this feature is reached out through plugins like Simple Page Ordering that permits the user to drag and drop the order of pages.
Posts and Pages are quite similar to each other. The following are some of the differences between the Posts and Pages.
- Pages are timeless, whereas, Posts are timely.
- Pages are non-social, whereas, Posts are social.
- Pages do not include RSS feeds, whereas, Post include RSS feeds.
- Posts do not have custom template features, whereas, Pages do have custom template features.
Description
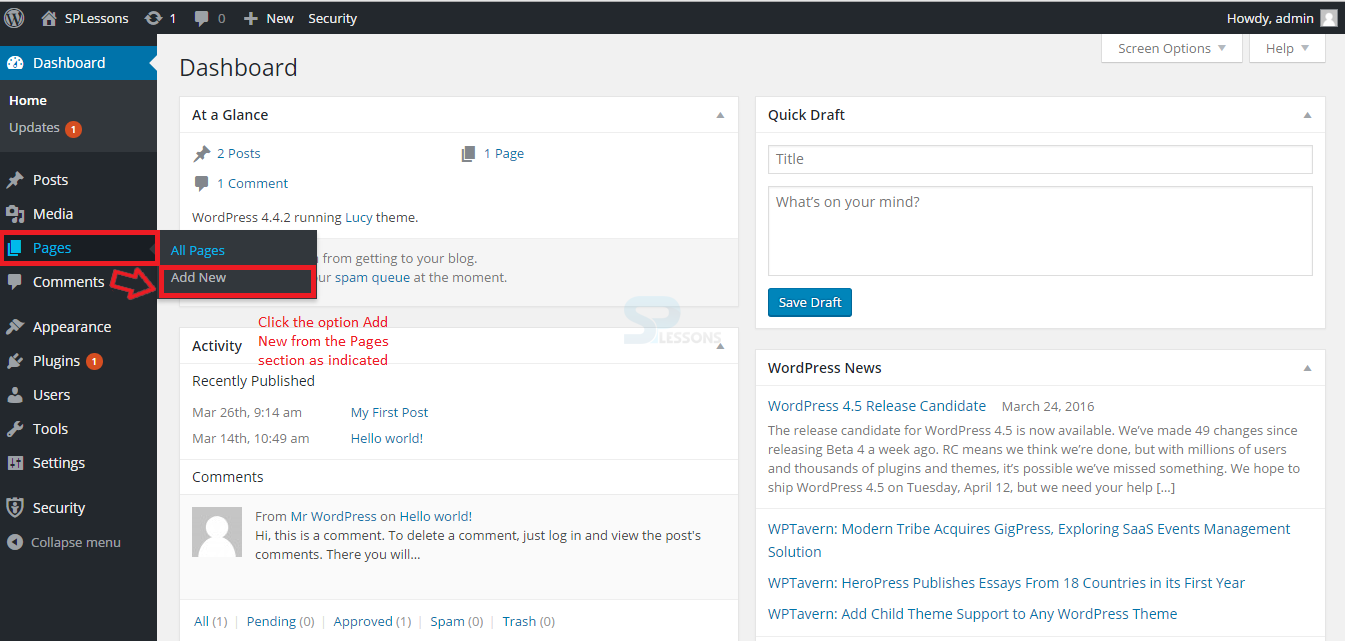
To create a new page, log in to the admin panel and hover on the Pages section. Select the Add New option as shown in the image below:
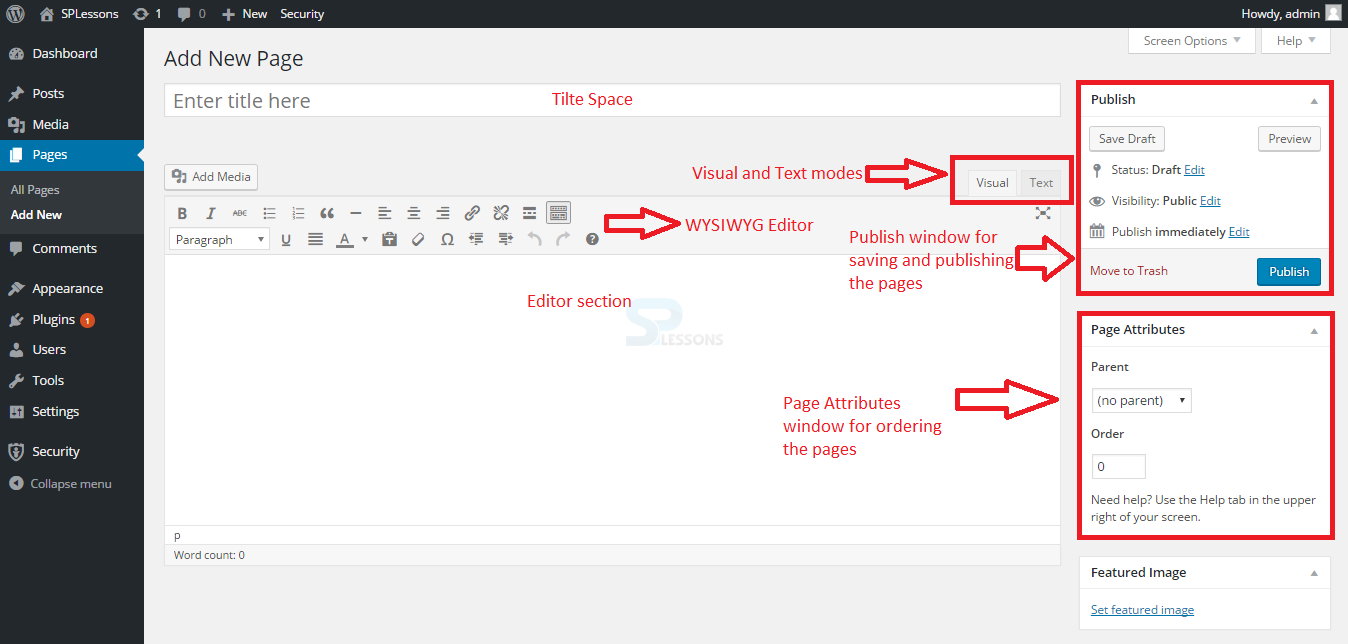
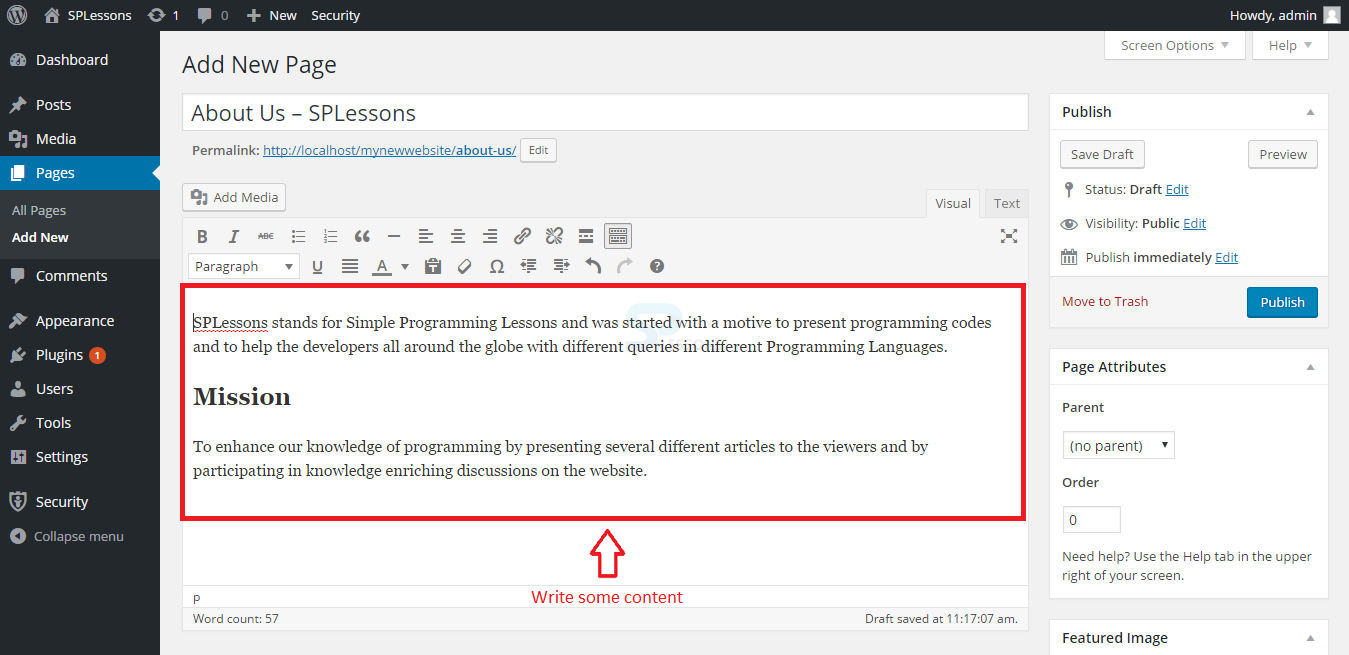
 Now, the Page with editor section that is quite similar to the Post editor page will appear. The image below demonstrates the main sections of Page editor:
 Now, follow the steps below to add a Page to the blog.
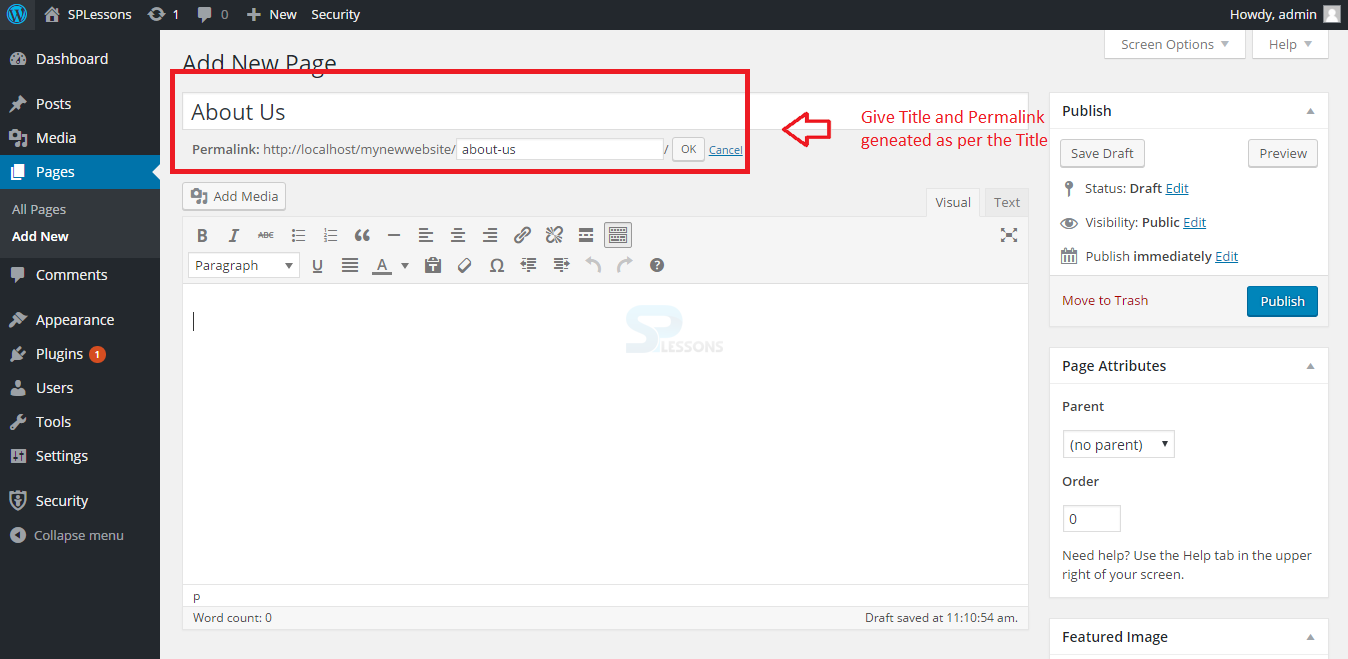
Step 1
Create a title for the Page by adding the title and Permalink. URL of the page should be the same as title as shown in the image below.
Step 2
Add some content in the Editor’s space like some useful information about the blog as shown in the image below:
Step 3
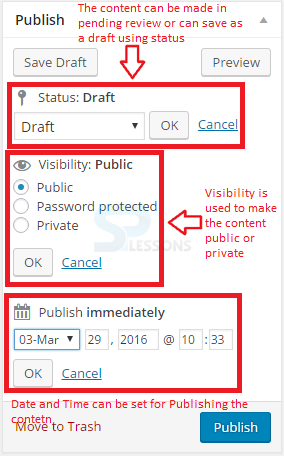
The Publish window in the Pages section is similar to Post section. Users can save the content as Draft and Preview the output. Even the Pages has date and time setting to publish the Content and the visibility can be edited as per the requirement. The unwanted Pages can be sent to the trash using the link Move to Trash as shown in the image below.
Step 4
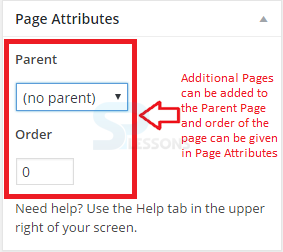
The Page Attributes window on the Page section is used to set the order of the page. Additional pages can be added to the parent page and any number of pages can be added. The image below displays the Page Attributes Window:
Step 5
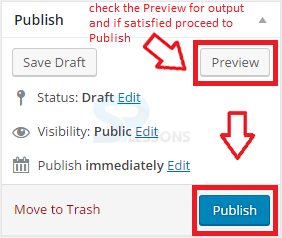
Once done with all the required changes, click the Preview button to view the page. Click the Publish button if changes are fine to go with as shown in the image below.
Key Points
- Tags and Categories are not used for Pages.
- The pages are mainly used to provide some information about the blogs.
- Creating a Page is as easy as creating a Post.