


 Introduction
This chapter explains about WordPress Tags and how to create a Tag. WordPress Tags are similar to categories and are used to describe the post in detail. Following concepts are covered in this chapter:
- Tags
- Difference between Tags and Categories
- Creating WordPress Tags
Description
WordPress Tags will provide more flexibility in organizing and describing the content. Tags are useful for a reader to find the related information to a particular post. Multiple Tags can be used for each post, for example a post with men’s category on a fashion blog can be tagged with the different names for clothes and accessories.
Tags are used for more specific keywords or targeted phrases that someone might be searching for on Google. If a user starts to type a word that matches with a tag that is already been used, it will show a suggestion which can be used as a tag. This is an easy way of trying to keep the tags organized, thus avoiding duplicate tags.
Description
One thing that differentiates categories and tags is that categories can be used to organize the content from the front, while tags allow the client to connect and index the posts from the back.
Following are some of the main key differences between Tags and Categories:
- Categories can be divided into sub-categories, whereas, Tags cannot be divided.
- Categories are used to group the content by various topics on the site, whereas, Tags represent the main elements of content for that respective post.
- Usually a post should contain only one or two categories, whereas, Tags can be unlimited and are optional.
Description
Before creating a Tag, it is good to be familiar with the WordPress Tag concept. To create a Tag in WordPress, follow the steps below:
Step 1
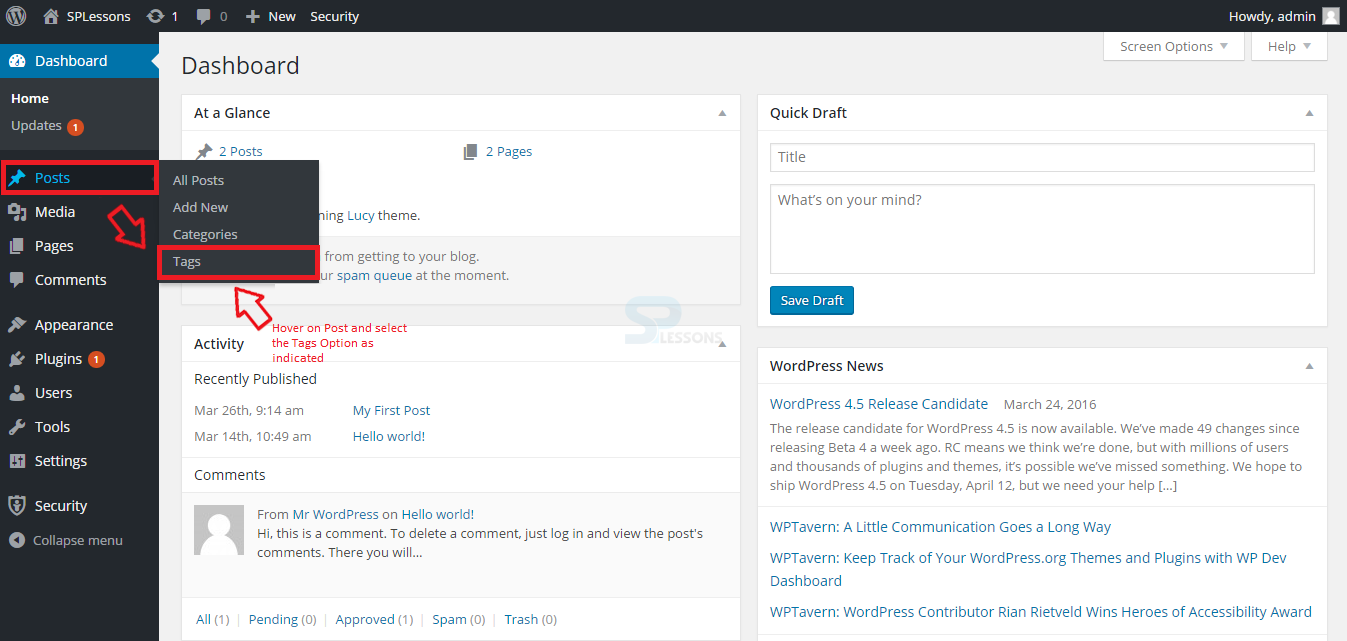
First, get logged into WordPress Admin Panel and hover on the Posts section. Select and click the Tags option from the Posts section as shown in the image below:
Step 2
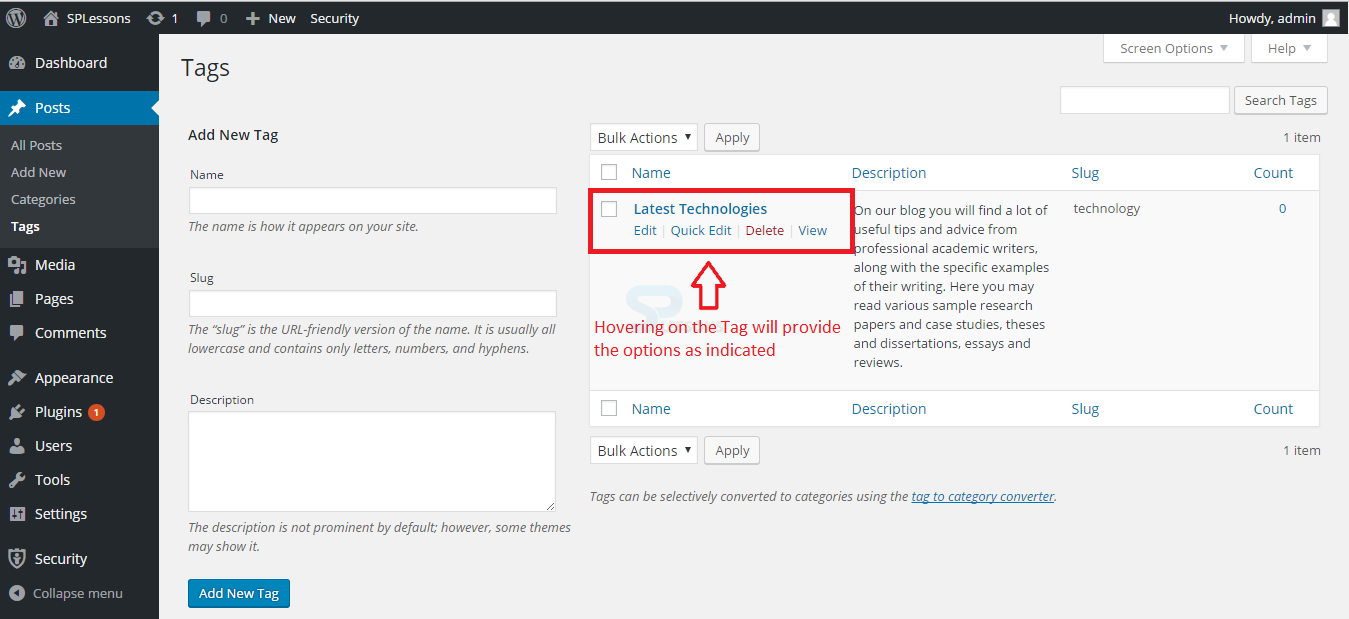
Now, a page with some options for creating a new tag will appear. Fill all the required details like Tag Name, Tag Slug and Tag Description and then proceed by clicking the Add New Tag button for creating a tag as shown in the image below:

Step 3
Now, the created tag can be viewed in the same Tags page located at the right side of the screen as shown in the image below:

Step 4
Hovering on the created tag will provide some options like Edit, Quick Edit, Delete and View as shown in the image below.
 Edit
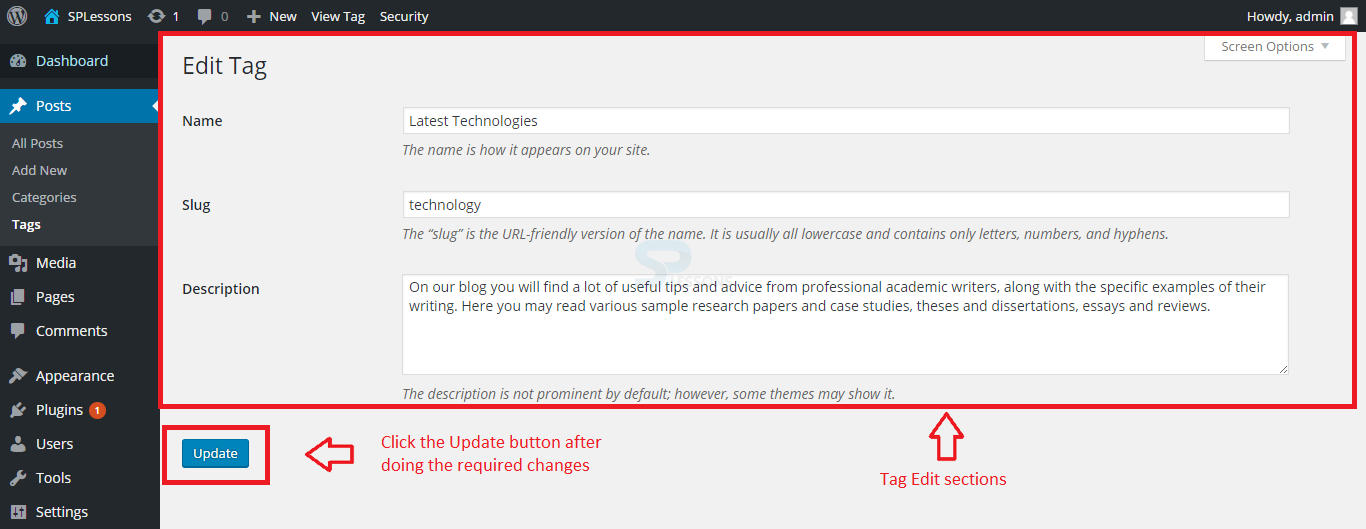
Using Edit link, the user can make changes to the Tag and can update those changes using Update button as shown in the image below.
Edit
Using Edit link, the user can make changes to the Tag and can update those changes using Update button as shown in the image below.
 Quick Edit
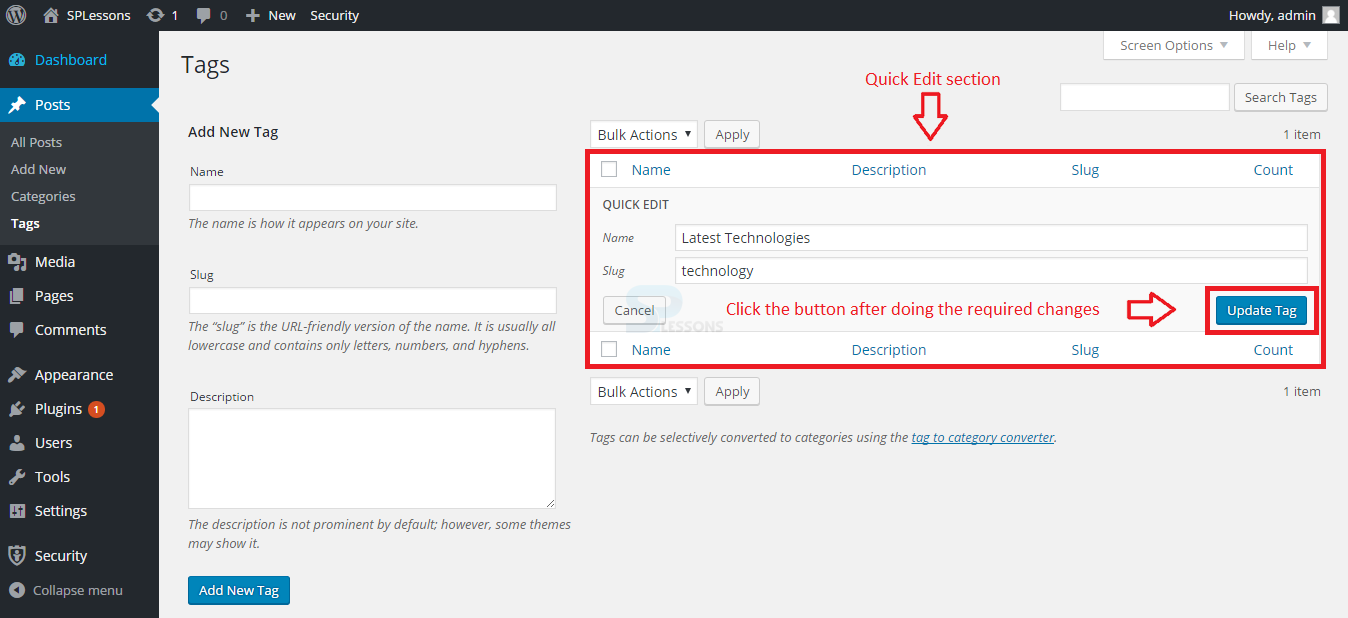
Using Quick Edit, the user can make changes to the tag quickly in the same window without redirecting to another page as shown in the image below.
Quick Edit
Using Quick Edit, the user can make changes to the tag quickly in the same window without redirecting to another page as shown in the image below.
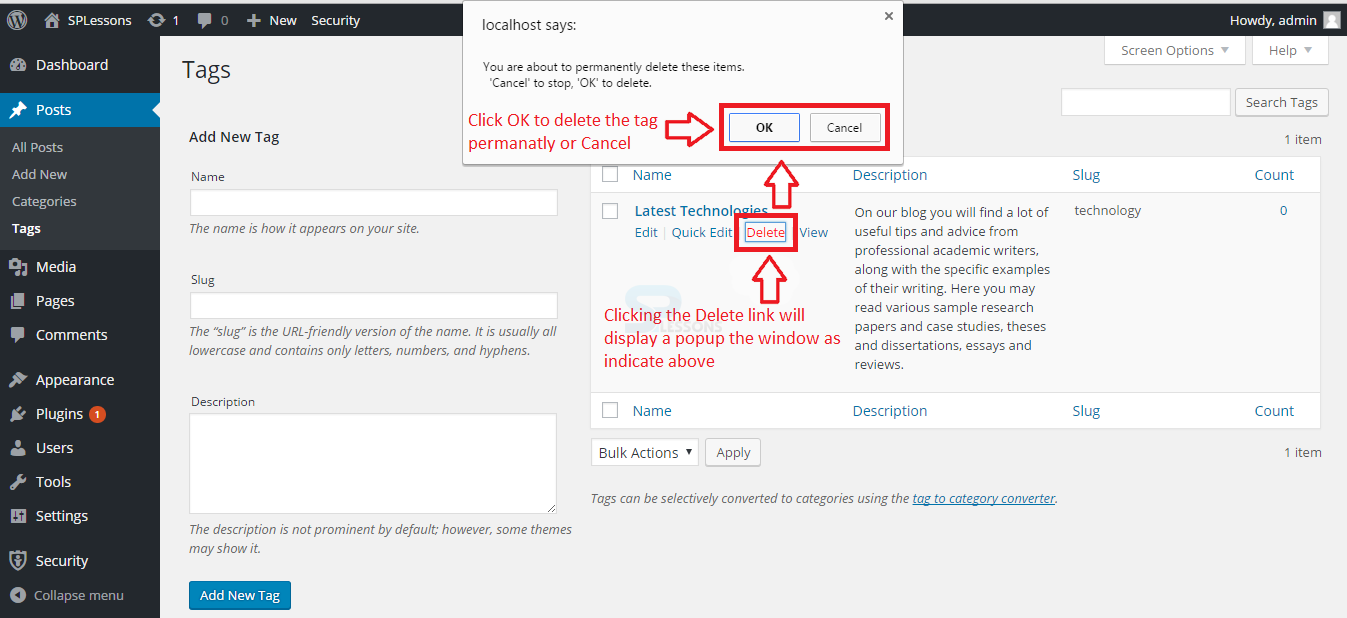
 Delete
Using Delete link, the user can delete the Tag. Clicking on the link will display a popup window providing two options OK and Cancel, proceed by clicking Ok to delete the tag or cancel the process. The image below displays the Popup window:
Delete
Using Delete link, the user can delete the Tag. Clicking on the link will display a popup window providing two options OK and Cancel, proceed by clicking Ok to delete the tag or cancel the process. The image below displays the Popup window:
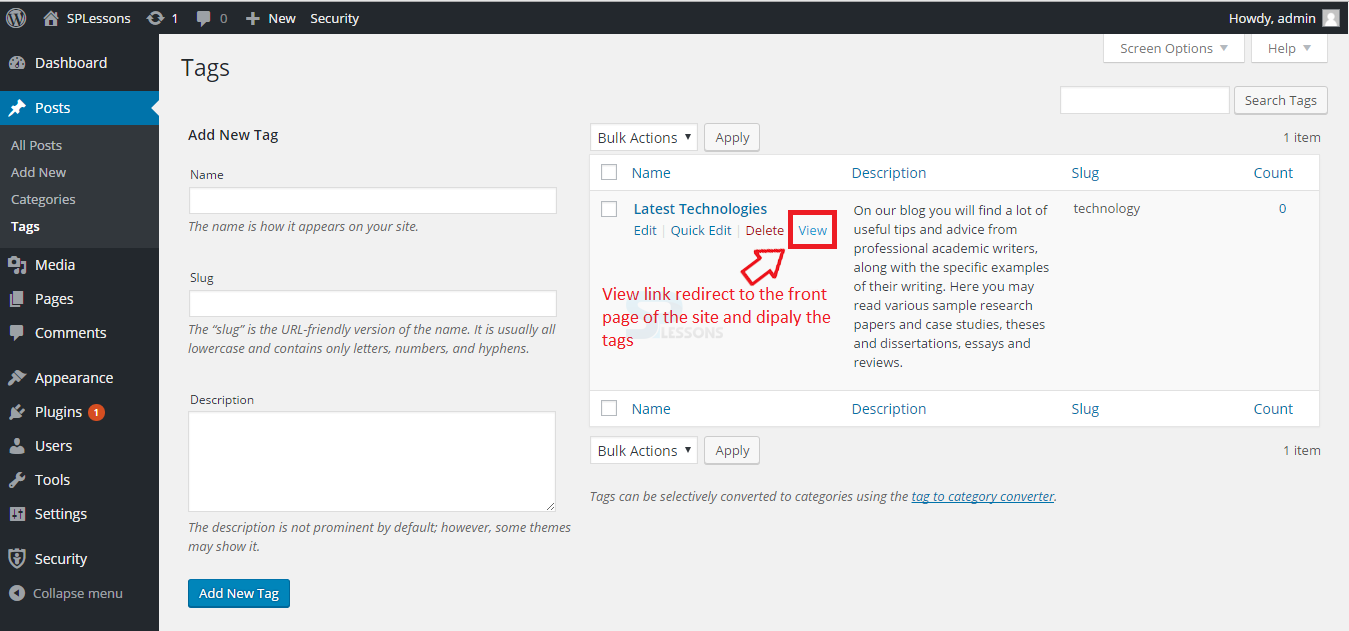
 View
Using the View link, the user can view the preview of the tag on the site. The image below displays the View link for tag.
View
Using the View link, the user can view the preview of the tag on the site. The image below displays the View link for tag.
Key Points
- Tags make the website more effective.
- Tags vary from site to site.
- Tags are used for more specific keywords or targeted phrases, which are searched by visitors on Google.